Difference between revisions of "CSC212 Lab 1 2014"
(→Part 3: Playing with emacs) |
(→Documentation for Linux Commands) |
||
| (29 intermediate revisions by the same user not shown) | |||
| Line 1: | Line 1: | ||
--[[User:Thiebaut|D. Thiebaut]] ([[User talk:Thiebaut|talk]]) 09:37, 3 September 2014 (EDT) | --[[User:Thiebaut|D. Thiebaut]] ([[User talk:Thiebaut|talk]]) 09:37, 3 September 2014 (EDT) | ||
---- | ---- | ||
| + | <br /> | ||
| + | __TOC__ | ||
| + | <br /> | ||
| + | <br /> | ||
| + | <bluebox> | ||
| + | This is the first Lab for CSC212. It introduces many different tools you will use this semester. Today, the purpose is to give you an overview. Get you introduced to the different tools. This process will require practice, time, and patience. Don't worry if this looks overwhelming. You'll have time to get familiar with every tool during the coming weeks. | ||
| + | <br /> | ||
| + | Today, you will: | ||
| + | # review some Python (just to make sure you remember the logic of programming) | ||
| + | # learn how to connect to your class account on '''beowulf2''' | ||
| + | # learn how to use the emacs editor | ||
| + | # create simple Java programs. | ||
| + | </bluebox> | ||
| + | <br /> | ||
| + | |||
=Part 1: Python Review= | =Part 1: Python Review= | ||
<br /> | <br /> | ||
| Line 129: | Line 144: | ||
<br /><br /> | <br /><br /> | ||
<br /> | <br /> | ||
| − | =Part 2: | + | =Part 2: Connection to a Remote Computer Server: Beowulf2= |
| + | <br /> | ||
| + | <tanbox> | ||
| + | In this section you will learn how to connect to a remote computer and work on it using the ''shell'', or ''Terminal''. The server for the CS department is called ''beowulf2''. Its address is beowulf2.csc.smith.edu. | ||
| + | </tanbox> | ||
| + | <br /> | ||
| + | ==Using a Shell or Terminal== | ||
| + | <br /> | ||
| + | There are 3 different ways for you to connect to our server: | ||
| + | * From a Linux computer in FH342 | ||
| + | * From a Mac laptop | ||
| + | * From a Windows laptop. | ||
| + | <br /> | ||
| + | Whatever computer you have, it is good for a computer science to be familiar with more than one way to connect to remote computers. Try to use different methods during the semester. | ||
| + | <br /> | ||
| + | ===For Windows PCs, Additional Software is Needed=== | ||
| + | <br /> | ||
| + | If you're using a Windows PC, go to [https://www.smith.edu/smithsoftware/index.html https://www.smith.edu/smithsoftware/index.html] and download the SSH package after having read the installation instructions. | ||
| + | <br /> | ||
| + | <center>[[Image:SmithCollegeSoftwareDownloadSSH.png|600px]]</center> | ||
<br /> | <br /> | ||
| − | + | * You should get a file called '''ssh.exe''' in your Download folder. | |
| + | * Double click on it and accept all the default answers to installation questions. You should end up with 2 new icons on your desktop: | ||
| − | + | <br /> | |
| − | + | <center>[[Image:sshIconsWindows.png|200px]]</center> | |
| + | <br /> | ||
| − | + | * Once installed, double click on the blue icon (ssh), and then on '''Quick Connect''' | |
| + | * Enter your login information from the CSC212 account sheet. | ||
| + | * Click '''Yes''' | ||
| + | * Enter your password | ||
| + | * Et voilà! | ||
| + | <br /> | ||
| + | <center>[[Image:sshWindowOnWindows.png|500px]]</center> | ||
| + | <br /> | ||
| − | + | <br /> | |
| − | + | ||
| − | + | * You're ready to start working on Beowulf2! | |
| − | + | <br /> | |
| − | + | ===For Mac Users: Use Terminal=== | |
| + | <br /> | ||
| + | * Open a terminal window and type the following command at the prompt: | ||
| + | <br /> | ||
| + | ssh 220a-'''xx'''@beowulf2.csc.smith.edu | ||
| + | <br/> | ||
| + | * replace '''xx''' by your 2-letter Id. | ||
| + | * provide your new password when prompted | ||
| + | * You should end up with a screen similar to this one: | ||
| + | <br /> | ||
| + | <center>[[Image:MacTerminalSSHBeowulf2.png|500px]]</center> | ||
| + | <br /> | ||
| − | If | + | ==For Users of our Linux Computers== |
| + | <br /> | ||
| + | * If you are using one of the desktops in FH342, make sure it is '''NOT''' running Windows. If it is, restart the computer and pick the '''Linux Mint''' operating system. | ||
| + | * At the prompt enter your new 212a-xx account and password. | ||
| + | * Locate the Terminal application and open it up. | ||
| + | * You should be ready to roll! | ||
| + | <br /> | ||
| + | <center>[[Image:MintTerminalWindow.png|500px]]<br />(online image taken from http://community.linuxmint.com/tutorial/view/244)</center> | ||
| + | <br /> | ||
| − | + | ==Connected to Beowulf2: Now what?== | |
| − | + | <br /> | |
| + | * You only need a handful of commands to start with: | ||
| + | ** '''ls''' (ell ess) to list files | ||
| + | ** '''cp''' to copy files | ||
| + | ** '''rm''' to remove files | ||
| + | ** '''cat''' to display the contents of text files (and programs) | ||
| + | <br /> | ||
| + | * Let's try to play with some text files. I have prepared 3 text files for you to play with. You can get them from my 212a account by typing these commands at the prompt: | ||
| + | |||
| + | getcopy file1.txt | ||
| + | getcopy file2.txt | ||
| + | getcopy file3.txt | ||
| + | |||
| + | * Now see if the files have ended up in your directory with the command '''ls''' (ell ess). Just type '''ls''' followed by the RETURN key. | ||
| + | * To display the contents of each one in the Terminal window, just '''cat''' them. | ||
| + | |||
| + | cat file1.txt | ||
| + | cat file2.txt | ||
| + | cat file3.txt | ||
| + | |||
| + | :and you can also '''cat''' them all at once: | ||
| + | |||
| + | cat file1.txt file2.txt file3.txt | ||
| + | |||
| + | * Remove file3.txt with '''rm''': | ||
| + | |||
| + | rm file3.txt | ||
| + | |||
| + | * and check with '''ls''' that the file is gone. | ||
| + | * make a copy of file1.txt and name the copy file4.txt: | ||
| + | |||
| + | cp file1.txt file4.txt | ||
| + | ls | ||
| + | cat file4.txt | ||
| + | |||
| + | * remove all files that start with the string '''file''': | ||
| − | + | rm file* | |
| − | |||
| − | + | :Note that it is always dangerous to remove files and use the star character! You could delete more files than you wanted! So be careful. | |
| − | + | <br /> | |
| − | + | ===Documentation for Linux Commands=== | |
| − | + | <br /> | |
| − | You may want to | + | * '''Linux Mint''' has a nice community of users who have created some good tutorials and reference pages. You may want to browse through this [http://community.linuxmint.com/tutorial/view/244 page of Terminal commands] and try different commands at the Linux prompt. |
| − | + | * You can also use the '''manual pages''' for Linux systems. '''All''' Linux systems have their internal manual where all the commands are documented. These manual pages are all that is needed for computer gurus to figure out how to use commands. However, they are often very cryptic and hard to decipher. Nonetheless, you should get used to them and look up commands and their variations when you forget how to use a particular command: | |
| − | + | ||
| − | + | man ls ''(will display the manual page for the ls command)'' | |
| − | + | man cat ''(will display the manual page for the cat command)'' | |
| − | + | man -k remove ''(will display all the pages that contain the '''keyword''' "remove". '''rm''' should be there...)'' | |
| − | + | ||
| − | + | <br /> | |
| − | |||
| + | =Part 3: Creating & Editing Files with Emacs:= | ||
| + | <br /> | ||
| + | ==Configure Emacs== | ||
| + | <br /> | ||
| + | * Enter the following command at the Linux prompt (note the period in front of "emacs"): | ||
| + | '''getcopy .emacs''' | ||
| + | cp: overwrite `./.emacs'? '''y''' | ||
| + | :It's a configuration file that will allow emacs to understand the backspace key correctly. ''You only need to do this once and you will be set for the semester.'' | ||
<br /> | <br /> | ||
| − | = | + | ==Editing a File== |
<br /> | <br /> | ||
| − | + | * You will now get a copy of a file from my account, and edit it. The file is called Fulghum and is a short story from [http://www.robertfulghum.com/ Robert Fulghum's] book [http://en.wikipedia.org/wiki/All_I_Really_Need_to_Know_I_Learned_in_Kindergarten ''All I really need to know I learned in Kindergarten'']. | |
| − | + | * Get a copy of the file: | |
| − | |||
| − | + | getcopy fulghum | |
| − | |||
| − | |||
| − | + | * Edit the file: | |
| + | emacs fulghum | ||
| − | |||
| − | + | * Simply work on the first paragraph of the file, and try to straighten it up. I have indicated below, on the right-hand side, the different emacs commands you can use to fix the text on your screen. | |
| − | |||
| − | |||
| − | |||
| − | |||
| − | |||
| − | |||
| − | Simply work on the first paragraph of the file, and try to straighten it up. I have indicated below, on the right-hand side, | ||
[[Image:fulghum_emacs.jpg|750px]] | [[Image:fulghum_emacs.jpg|750px]] | ||
| − | When you are done with the modification, or if you want to stop for right now and save your modifications, type C-x C-c, and press y when emacs asks if you want to save the file. | + | * When you are done with the modification, or if you want to stop for right now and save your modifications, type C-x C-c, and press '''y''' when emacs asks if you want to save the file. |
| + | <br /> | ||
| + | ==Some Useful Emacs Commands== | ||
| + | <br /> | ||
Below is a summary of some useful emacs commands. | Below is a summary of some useful emacs commands. | ||
| Line 248: | Line 344: | ||
<br /> | <br /> | ||
| + | =Part 4: Python in a Shell!= | ||
| + | <br /> | ||
| + | Don't try to open IDLE yet! You are going to create a Python program in the Terminal, on Beowulf2! | ||
| + | <br /> | ||
| + | Follow these simple steps: | ||
| + | * At the Linux prompt, type | ||
| + | |||
| + | emacs helloWorld.py | ||
| + | |||
| + | * Enter the following program in the emacs window: | ||
| + | <br /> | ||
| + | :::<source lang="python"> | ||
| + | def main(): | ||
| + | print( "Hello, World!" ) | ||
| + | print() | ||
| + | |||
| + | main() | ||
| + | </source> | ||
| + | <br /> | ||
| + | * Quit emacs with '''Control-X Control-C''' | ||
| + | * You should be back at the Linux prompt. Run the Python interpreter, and tell it to read and execute the program you just created: | ||
| + | |||
| + | python3 helloWorld.py | ||
| + | |||
| + | :Does it output the right string? If not, go back and edit your Python program until you get the right output. | ||
| + | <br /> | ||
| + | * Modify your program and make it output this: | ||
| + | |||
| + | ***************** | ||
| + | * Hello, World! * | ||
| + | ***************** | ||
| + | |||
| + | <br /> | ||
| + | =Part 5: Java in the Shell (100 points, required)= | ||
| + | <br /> | ||
| + | You now know everything needed to | ||
| + | # connect to the beowulf2 server | ||
| + | # create a program called '''HelloWorld.java''' with emacs | ||
| + | # compile and run your Java program. | ||
| + | <br /> | ||
| + | * Here is the code of the program you need to create: | ||
| + | <br /> | ||
| + | <source lang="java"> | ||
| + | class HelloWorld { | ||
| + | |||
| + | public static void main( String[] args ) { | ||
| + | System.out.println( "Hello, World!" ); | ||
| + | System.out.println( ); | ||
| + | |||
| + | } | ||
| + | |||
| + | } | ||
| + | </source> | ||
| + | <br /> | ||
| + | * Here are the commands you need to use: | ||
| + | |||
| + | javac HelloWorld.java | ||
| + | java HelloWorld | ||
| + | |||
| + | * Go ahead, make your program display the famous string and demonstrate it to me, please. This part is worth 100 points for Lab 1. | ||
| + | |||
| + | |||
| + | <br /> | ||
| + | <br /> | ||
| + | <br /> | ||
| + | <br /> | ||
| + | <br /> | ||
| + | <br /> | ||
| + | <br /> | ||
| + | <br /> | ||
| + | <br /> | ||
| + | <br /> | ||
| + | <br /> | ||
| + | <br /> | ||
| + | <br /> | ||
| + | [[Category:Labs]][[Category:CSC212]][[Category:Java]][[Category:Linux]] | ||
Latest revision as of 11:42, 4 September 2014
--D. Thiebaut (talk) 09:37, 3 September 2014 (EDT)
Contents
This is the first Lab for CSC212. It introduces many different tools you will use this semester. Today, the purpose is to give you an overview. Get you introduced to the different tools. This process will require practice, time, and patience. Don't worry if this looks overwhelming. You'll have time to get familiar with every tool during the coming weeks.
Today, you will:
- review some Python (just to make sure you remember the logic of programming)
- learn how to connect to your class account on beowulf2
- learn how to use the emacs editor
- create simple Java programs.
Part 1: Python Review
The problem below is taken from CSC111, Homework 10 given Spring 2014. Work out a solution in pair or individually. There is nothing to submit for this part.
Lost Cat
(image from nicepixy.net)
The program below is missing its class! And it is also missing its documentation! It used to contain a class defined, with methods and member variables, and a fully developed documentation, but unfortunately all of them got erased.
We do have the output of a run of the program, though, when it still had its class definition. Both the incomplete code and the output are shown below.
#
# missing class goes here...
#


def getNewCat():
    print( "\nPlease enter the information for the new cat:")
    name = input(       "Cat name?         " )
    age  = int( input(  "Age, in years?    " ) )
    vac  = input(       "Vaccinated (Y/N)? " ).strip().lower()
    vac  = vac in ['y', 'yes']
    neut = input(       "Neutered (Y/N)?   " ).strip().lower()
    neut = neut in ['y', 'yes' ]
    breed= input(       "Breed?            " ).strip()

    return Cat( name, age, vac, neut, breed )

def display( L, caption ):
    print( "\n\n"+caption )
    print( "=" * len( caption ) )
    for cat in L:
        print( cat )

def main():
    text="""Minou, 3, Yes, Yes, stray
            Max, 1, Yes, No, Burmese
            Gizmo, 2, No, No, Bengal
            Garfield, 4, Yes, Yes, Orange Tabby"""

    for line in text.split( "\n" ):
        words = line.strip().split( "," )
        if len( words ) != 5:
            continue
        name, age, vaccinated, neutered, breed = words
        age = int( age.strip() )
        if vaccinated.strip().lower() == "yes":
            vaccinated = True
        else:
            vaccinated = False

        neutered = neutered.strip().lower() == "yes"

        cat = Cat( name.strip(), age, vaccinated, neutered, breed.strip() )
        try:
            cats.append( cat )
        except NameError:
            cats = []
            cats.append( cat )

    display( cats, "List of cats:" )

    cats.append( getNewCat() )

    display( cats, "List of cats with new addition:" )

    vaccinatedNeuteredCats = []
    for cat in cats:
        if cat.isVaccinated() and cat.isNeutered():
            vaccinatedNeuteredCats.append( cat )

    display( vaccinatedNeuteredCats, "Vaccinated and neutered cats:" )


main()
Output
List of cats:
=============
Cat: Minou, age: 3, vaccinated, neutered (stray)
Cat: Max, age: 1, vaccinated, not neutered (Burmese)
Cat: Gizmo, age: 2, not vaccinated, not neutered (Bengal)
Cat: Garfield, age: 4, vaccinated, neutered (Orange Tabby)

Please enter the information for the new cat:
Cat name?         Ralph
Age, in years?    4
Vaccinated (Y/N)? y
Neutered (Y/N)?   y
Breed?            Angora


List of cats with new addition:
===============================
Cat: Minou, age: 3, vaccinated, neutered (stray)
Cat: Max, age: 1, vaccinated, not neutered (Burmese)
Cat: Gizmo, age: 2, not vaccinated, not neutered (Bengal)
Cat: Garfield, age: 4, vaccinated, neutered (Orange Tabby)
Cat: Ralph, age: 4, vaccinated, neutered (Angora)


Vaccinated and neutered cats:
=============================
Cat: Minou, age: 3, vaccinated, neutered (stray)
Cat: Garfield, age: 4, vaccinated, neutered (Orange Tabby)
Cat: Ralph, age: 4, vaccinated, neutered (Angora)
- Question
Recreate the original Python program with its Cat class. Make sure that it will generate the same output shown above if fed the same cat information.
Solution
- Solution (will be released later)
Part 2: Connection to a Remote Computer Server: Beowulf2
In this section you will learn how to connect to a remote computer and work on it using the shell, or Terminal. The server for the CS department is called beowulf2. Its address is beowulf2.csc.smith.edu.
Using a Shell or Terminal
There are 3 different ways for you to connect to our server:
- From a Linux computer in FH342
- From a Mac laptop
- From a Windows laptop.
Whatever computer you have, it is good for a computer science to be familiar with more than one way to connect to remote computers. Try to use different methods during the semester.
For Windows PCs, Additional Software is Needed
If you're using a Windows PC, go to https://www.smith.edu/smithsoftware/index.html and download the SSH package after having read the installation instructions.
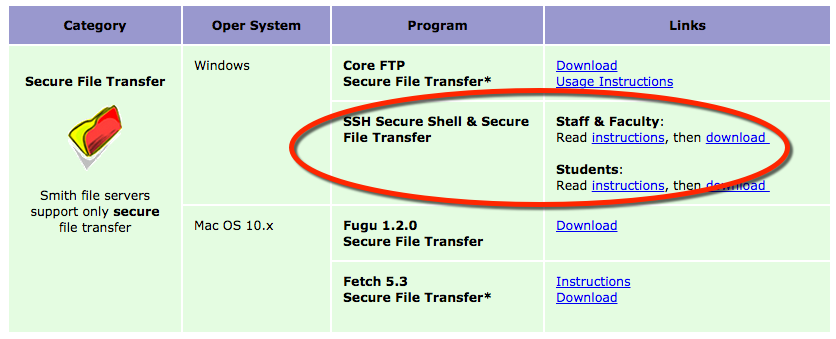
- You should get a file called ssh.exe in your Download folder.
- Double click on it and accept all the default answers to installation questions. You should end up with 2 new icons on your desktop:
- Once installed, double click on the blue icon (ssh), and then on Quick Connect
- Enter your login information from the CSC212 account sheet.
- Click Yes
- Enter your password
- Et voilà!
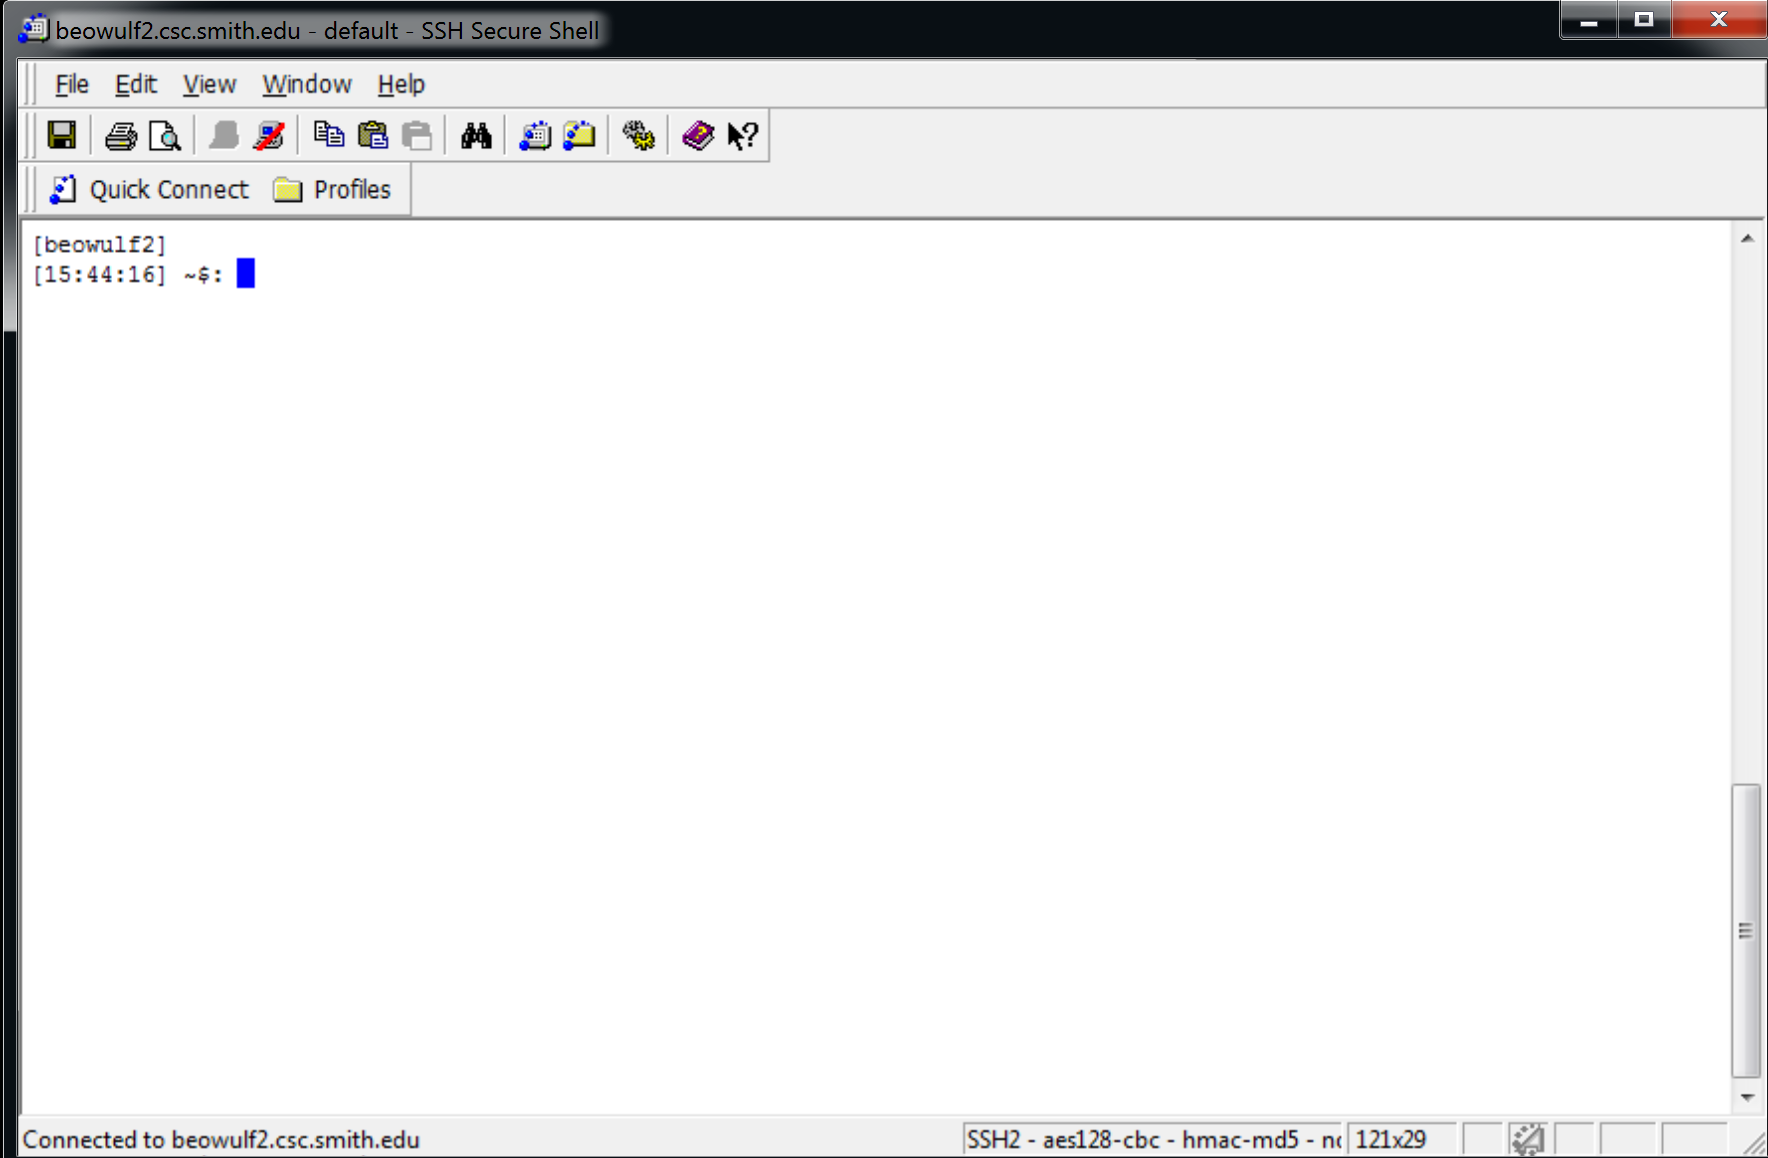
- You're ready to start working on Beowulf2!
For Mac Users: Use Terminal
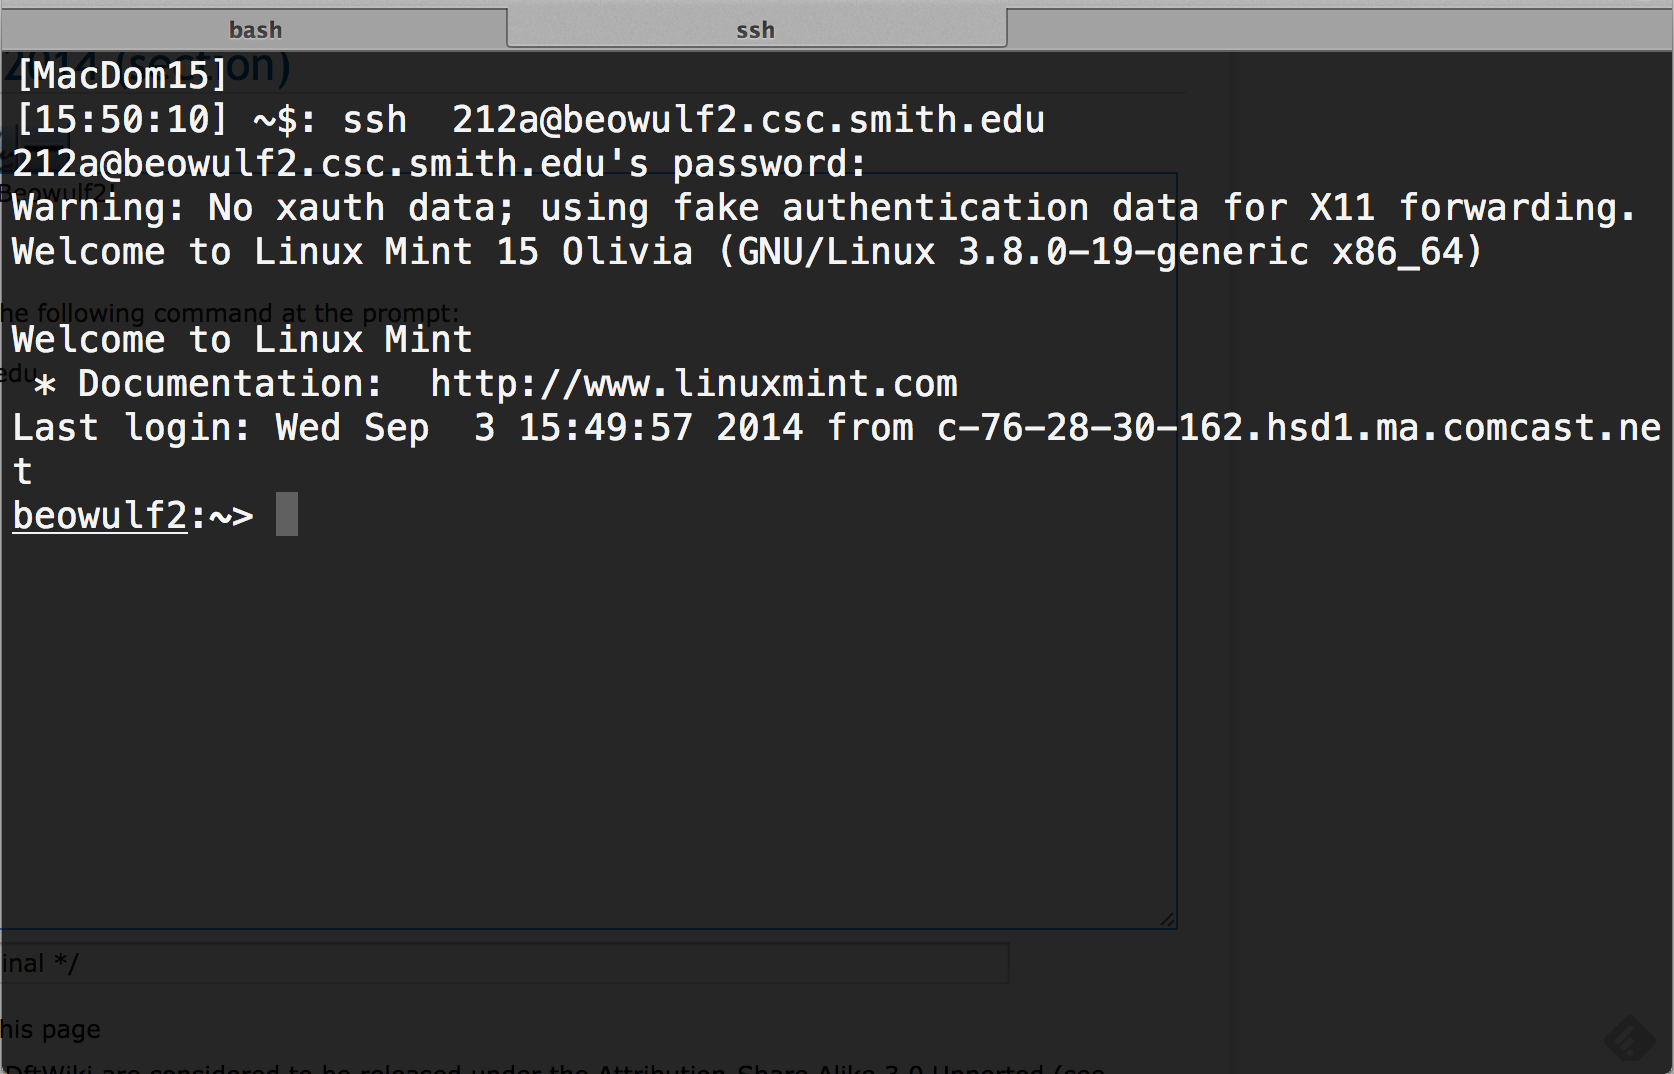
- Open a terminal window and type the following command at the prompt:
ssh 220a-xx@beowulf2.csc.smith.edu
- replace xx by your 2-letter Id.
- provide your new password when prompted
- You should end up with a screen similar to this one:
For Users of our Linux Computers
- If you are using one of the desktops in FH342, make sure it is NOT running Windows. If it is, restart the computer and pick the Linux Mint operating system.
- At the prompt enter your new 212a-xx account and password.
- Locate the Terminal application and open it up.
- You should be ready to roll!
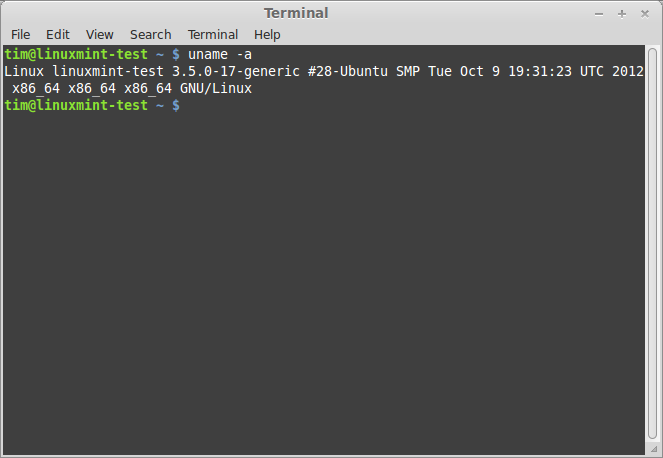
(online image taken from http://community.linuxmint.com/tutorial/view/244)
Connected to Beowulf2: Now what?
- You only need a handful of commands to start with:
- ls (ell ess) to list files
- cp to copy files
- rm to remove files
- cat to display the contents of text files (and programs)
- Let's try to play with some text files. I have prepared 3 text files for you to play with. You can get them from my 212a account by typing these commands at the prompt:
getcopy file1.txt
getcopy file2.txt
getcopy file3.txt
- Now see if the files have ended up in your directory with the command ls (ell ess). Just type ls followed by the RETURN key.
- To display the contents of each one in the Terminal window, just cat them.
cat file1.txt
cat file2.txt
cat file3.txt
- and you can also cat them all at once:
cat file1.txt file2.txt file3.txt
- Remove file3.txt with rm:
rm file3.txt
- and check with ls that the file is gone.
- make a copy of file1.txt and name the copy file4.txt:
cp file1.txt file4.txt
ls
cat file4.txt
- remove all files that start with the string file:
rm file*
- Note that it is always dangerous to remove files and use the star character! You could delete more files than you wanted! So be careful.
Documentation for Linux Commands
- Linux Mint has a nice community of users who have created some good tutorials and reference pages. You may want to browse through this page of Terminal commands and try different commands at the Linux prompt.
- You can also use the manual pages for Linux systems. All Linux systems have their internal manual where all the commands are documented. These manual pages are all that is needed for computer gurus to figure out how to use commands. However, they are often very cryptic and hard to decipher. Nonetheless, you should get used to them and look up commands and their variations when you forget how to use a particular command:
man ls               (will display the manual page for the ls command)
man cat              (will display the manual page for the cat command)
man -k remove        (will display all the pages that contain the keyword "remove".  rm should be there...)
Part 3: Creating & Editing Files with Emacs:
Configure Emacs
- Enter the following command at the Linux prompt (note the period in front of "emacs"):
    getcopy .emacs
    cp: overwrite `./.emacs'? y
- It's a configuration file that will allow emacs to understand the backspace key correctly. You only need to do this once and you will be set for the semester.
Editing a File
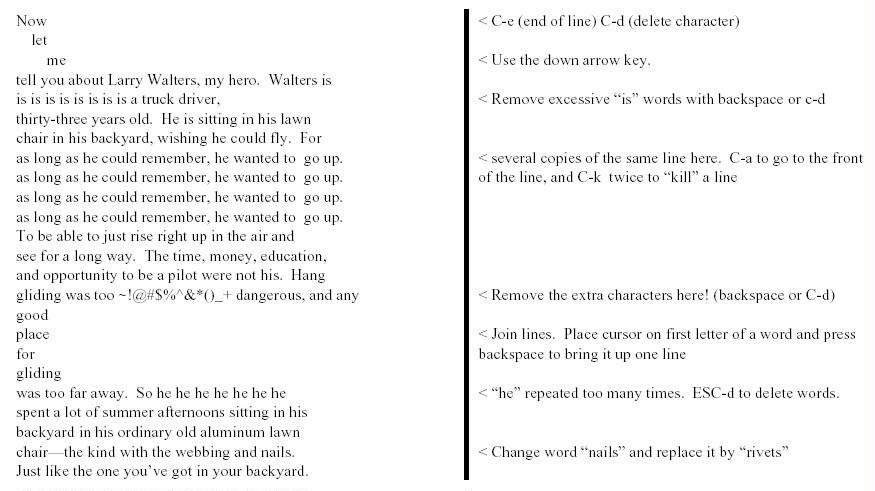
- You will now get a copy of a file from my account, and edit it. The file is called Fulghum and is a short story from Robert Fulghum's book All I really need to know I learned in Kindergarten.
- Get a copy of the file:
getcopy fulghum
- Edit the file:
emacs fulghum
- Simply work on the first paragraph of the file, and try to straighten it up. I have indicated below, on the right-hand side, the different emacs commands you can use to fix the text on your screen.
- When you are done with the modification, or if you want to stop for right now and save your modifications, type C-x C-c, and press y when emacs asks if you want to save the file.
Some Useful Emacs Commands
Below is a summary of some useful emacs commands.
You should find some time this week to go to a lab and read the Emacs at Smith handout while in front of the terminal, on your own. This is the best way to test and learn the different features of the editor!
| DEL/Shift Backspace | Delete previous character |
| c-d | Delete character at cursor |
| Esc-d | Delete word |
| c-k | Kill line |
| c-a | Go to beginning of line |
| c-e | Go to end of line |
| c-f | Move cursor 1 character forward |
| c-b | Move cursor 1 character backward |
| c-p | Move to previous line |
| c-n | Move to next line |
| c-x c-c | quit emacs and save file |
| c-x c-s | save file but remain in emacs |
| c-g | GE OUT OF TROUBLE! |
Part I of the homework assignment for this week is to edit the complete story about Larry Walters and his flight over Los Angeles.
Part 4: Python in a Shell!
Don't try to open IDLE yet! You are going to create a Python program in the Terminal, on Beowulf2!
Follow these simple steps:
- At the Linux prompt, type
emacs helloWorld.py
- Enter the following program in the emacs window:
def main():
    print( "Hello, World!" )
    print()

main()
- Quit emacs with Control-X Control-C
- You should be back at the Linux prompt. Run the Python interpreter, and tell it to read and execute the program you just created:
python3 helloWorld.py
- Does it output the right string? If not, go back and edit your Python program until you get the right output.
- Modify your program and make it output this:
*****************
* Hello, World! *
*****************
Part 5: Java in the Shell (100 points, required)
You now know everything needed to
- connect to the beowulf2 server
- create a program called HelloWorld.java with emacs
- compile and run your Java program.
- Here is the code of the program you need to create:
class HelloWorld {

    public static void main( String[] args ) {
        System.out.println( "Hello, World!" );
        System.out.println( );

    }

}
- Here are the commands you need to use:
javac HelloWorld.java
java HelloWorld
- Go ahead, make your program display the famous string and demonstrate it to me, please. This part is worth 100 points for Lab 1.

