Difference between revisions of "Debugging with Eclipse: A Quick Introduction"
(→Debugging DebugDemo) |
(→Debugging DebugDemo) |
||
| Line 60: | Line 60: | ||
<br /> | <br /> | ||
* In the '''Package Explorer''' tab (left tab), '''right/control click''' on ''DebugDemo'' and select '''Debug As''' and '''Java Application'''. | * In the '''Package Explorer''' tab (left tab), '''right/control click''' on ''DebugDemo'' and select '''Debug As''' and '''Java Application'''. | ||
| − | * The windows will reorganize themselves: | + | * The windows will reorganize themselves (if not, see below): |
<br /> | <br /> | ||
<center>[[Image:EclipseDebugger1.png|700px]]</center> | <center>[[Image:EclipseDebugger1.png|700px]]</center> | ||
<br /> | <br /> | ||
| − | * If you do not get the window shown above, click on the little "table and plus symbol" in the top right of the window, and pick '''Debug''' in the new pop-up window | + | * If you do not get the window shown above, click on the little "table and plus symbol" in the top right of the window, and pick '''Debug''' in the new pop-up window : |
<br /> | <br /> | ||
<center>[[Image:EclipseDebugger2.png|700px]]</center> | <center>[[Image:EclipseDebugger2.png|700px]]</center> | ||
<br /> | <br /> | ||
* You can switch back and forth between Java coding and debugging using the '''Java''' and '''Debug''' buttons in the top right of the Eclipse window. | * You can switch back and forth between Java coding and debugging using the '''Java''' and '''Debug''' buttons in the top right of the Eclipse window. | ||
Revision as of 09:54, 22 October 2014
--D. Thiebaut (talk) 10:44, 22 October 2014 (EDT)
Contents
This is a short tutorial on how to get started with the Eclipse Debugger. Mastering the debugger takes time. The purpose of this lab/tutorial is just to show you how to get started.
Getting Started
- Open Eclipse
- Create a New Java Class. Call it DebugDemo.
- Enter this code in it:
// DebugDemo.java
// D. Thiebaut
// CSC212
import java.util.ArrayList;
import java.util.Iterator;

class Pair {
	public String name;
	public int age;
	Pair( String f, int s ) { name=f; age=s; }
	public String toString() { return name+"("+age+") "; }
}

public class DebugDemo {


	public static void main(String[] args) {
                ArrayList<Pair> A = new ArrayList<Pair>();
		int increment = 3;

		A.add( new Pair( "Alice", 10 ) );
		A.add( new Pair( "Bob", 7 ) );

		Iterator<Pair> it = A.iterator();
		while ( it.hasNext() ) {
			Pair p = it.next();
			p.age += increment;
		}

		for ( int i=0; i<3; i++ ) {
			Pair p = A.get(  i );
			System.out.println( A.get( i ) );
		}
	}

}
- Run it.
- Observe what the program does. It simply creates an array of 2 pairs, containing Alice(10) and Bob(7), and modify the age of both by an increment of 3.
Debugging DebugDemo
- In the Package Explorer tab (left tab), right/control click on DebugDemo and select Debug As and Java Application.
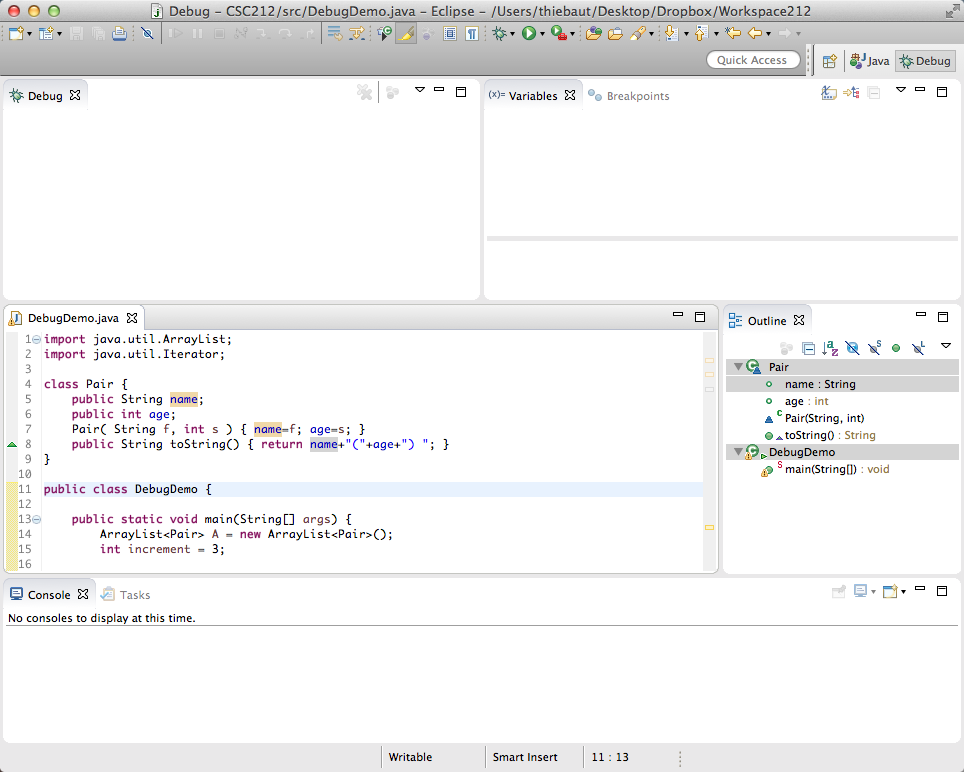
- The windows will reorganize themselves (if not, see below):

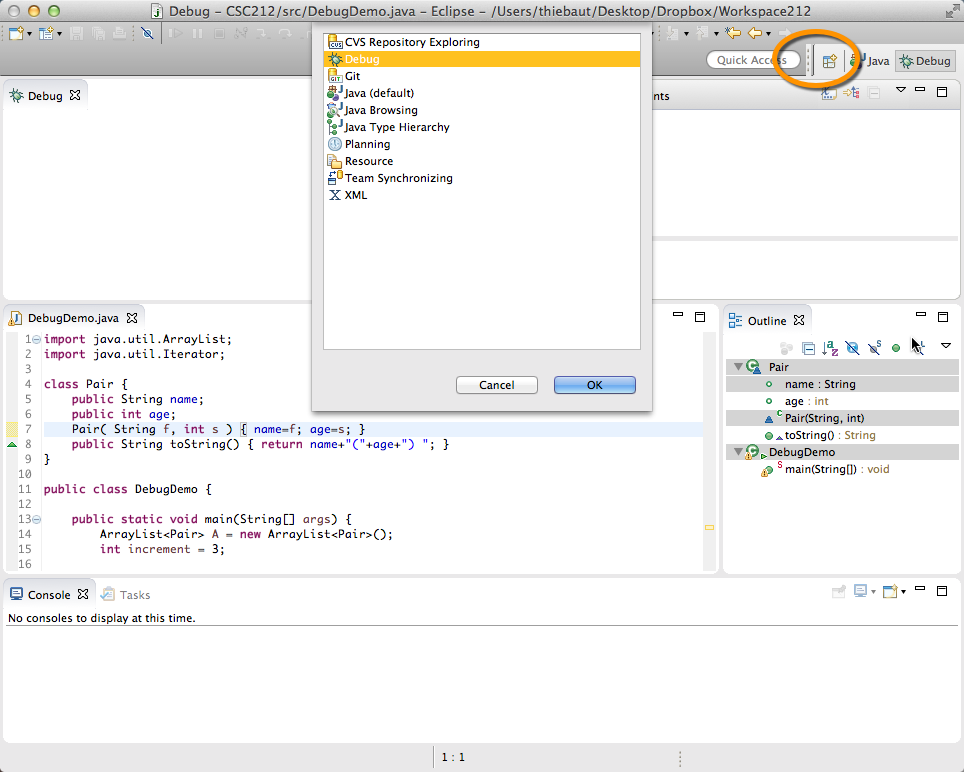
- If you do not get the window shown above, click on the little "table and plus symbol" in the top right of the window, and pick Debug in the new pop-up window :

- You can switch back and forth between Java coding and debugging using the Java and Debug buttons in the top right of the Eclipse window.