Difference between revisions of "CSC103 Lab 1 2011"
| Line 29: | Line 29: | ||
<br /> | <br /> | ||
<br /> | <br /> | ||
| − | + | ||
=Logic Simulator= | =Logic Simulator= | ||
| Line 327: | Line 327: | ||
Hope you enjoyed the lab! | Hope you enjoyed the lab! | ||
| − | + | ||
<Br /> | <Br /> | ||
Revision as of 10:33, 28 January 2011
--D. Thiebaut 09:47, 28 January 2011 (EST)
<meta name="keywords" content="computer science, How Computers Work, Dominique Thiebaut, smith college" /> <meta name="description" content="Dominique Thiebaut's Web Page" /> <meta name="title" content="Dominique Thiebaut -- Computer Science" /> <meta name="abstract" content="Dominique Thiebaut's Computer Science Web pages" /> <meta name="author" content="thiebaut at cs.smith.edu" /> <meta name="distribution" content="Global" /> <meta name="revisit-after" content="10 days" /> <meta name="copyright" content="(c) D. Thiebaut 2000, 2001, 2002, 2003, 2004, 2005, 2006, 2007,2008" /> <meta name="robots" content="FOLLOW,INDEX" />
Contents
This lab is divided into two parts. Work in pairs and alternate working at the keyboard. You do not have to turn in anything at the end. The goal of the lab is to get you to play with a logic gate simulator and with the creation of wiki pages.
Logic Simulator
The Applet
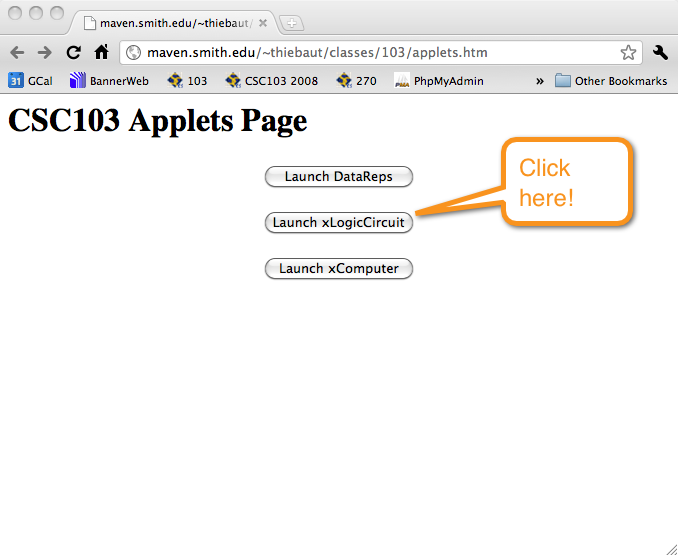
- Go to this page and click on the middle button: "Launch xLogicCircuit" and wait for the simulator to show up.
- You should see this window:
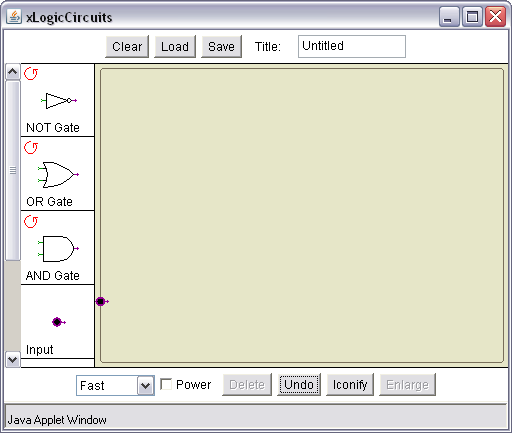
NOT, OR, and AND gates
Study all three fundamental gates: the NOT gate, the OR gate, and the AND gate.
The NOT gate
- Drag an input symbol on the leftmost part of the wiring area
- Drag an output symbol on the rightmost part of the wiring area
- Drag a NOT gate in the middle of the area
- Connect the input symbol to the input of the NOT gate with a wire (left click and drag), and the output of the NOt gate to the output symbol with another wire
- Turn the power on (bottom of the window)
- Left-click on the input symbol to generate a 1 (red) or a zero (blue). Try all possible variations of the input and verify that the output symbol is always the opposite of the input value.
Remember that you can drag symbols around by right-clicking on them.
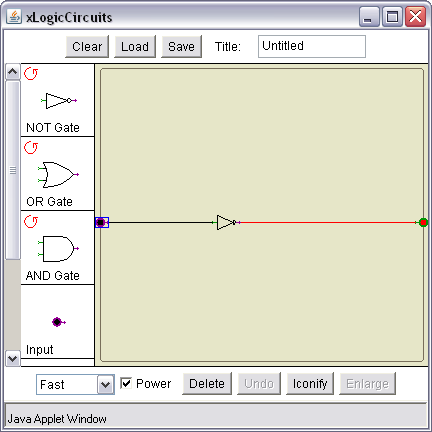
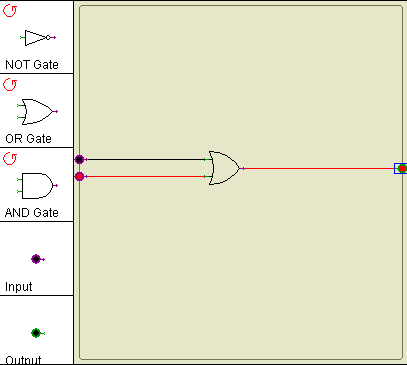
Once you're done, clear your wiring area and wire up an OR gate, as shown below:
The OR gate
Take the similar steps as you did for the NOT gate, and wire up an OR gate with 2 inputs. Try all possible combinations of the two inputs and verify that it's truth table is the following one:
| input1 | input2 | input1 OR input2 |
| 0 | 0 | 0 |
| 0 | 1 | 1 |
| 1 | 0 | 1 |
| 1 | 1 | 1 |
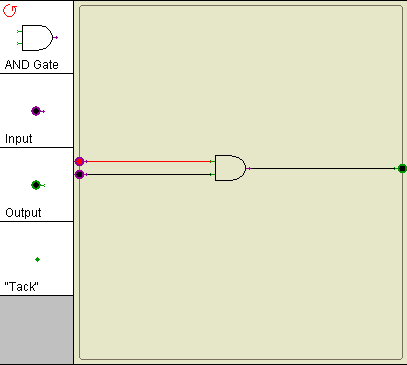
The AND gate
Take the similar steps as you did for the OR gate, and wire up an AND gate with 2 inputs. Try all possible combinatins of the two inputs and verify that it's truth table is the following one:
| input1 | input2 | input1 OR input2 |
| 0 | 0 | 0 |
| 0 | 1 | 0 |
| 1 | 0 | 0 |
| 1 | 1 | 1 |
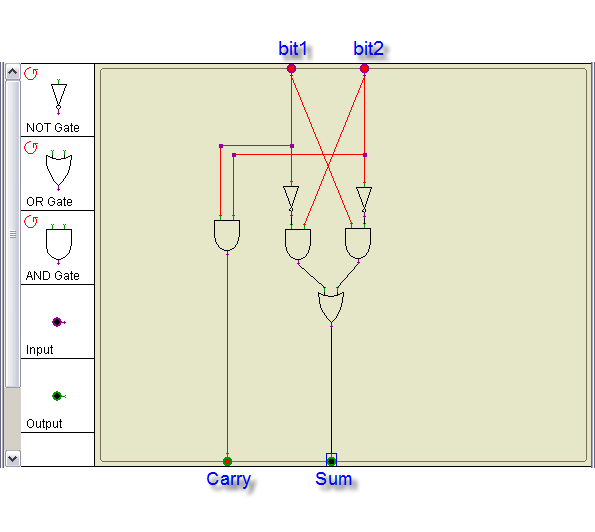
Binary Adder
Wire up the circuit of the binary adder which we have seen in class.
Try all possible combinations of the inputs, and verify that the outputs correspond to the sum of the two inputs, in binary.
| bit1 | + | bit2 | = | carry | sum | |
|---|---|---|---|---|---|---|
| 0 | + | 0 | = | 0 | 0 | |
| 0 | + | 1 | = | 0 | 1 | |
| 1 | + | 0 | = | 0 | 1 | |
| 1 | + | 1 | = | 1 | 0 |
3-Bit Adder
- A 3-bit adder is a circuit with 3 inputs, or bits, and two outputs, corresponding to the carry and the sum, as for the 2-bit adder.
- On a piece of paper, write the truth table for the 3-bit adder.
| b1 | b2 | b3 | carry | sum |
| 0 | 0 | 1 | ||
| 0 | 1 | 0 | ||
| 0 | 1 | 1 | ||
| 1 | 0 | 0 | ||
| 1 | 0 | 1 | ||
| 1 | 1 | 0 | ||
| 1 | 1 | 1 |
- Use the simulator to verify that the logic expression for the carry bit is
carry = ( a and b ) or ( a and c ) or ( b and c )
- Once you have wired and tested it, demonstrate it to your instructor, please! :-)
Wiki pages
- Go to the CSC103 Class Wiki page
- Click Log in at the top left of the page, and login using the account information that will have been given to you in class.
- Go back to the CSC103 page and click on the account in red that corresponds to your new identity.
- Since no page exists for you yet, Mediawiki will present you an editor window. Use this editor to create your page.
- Copy/paste the text in the box below into your editor window.
=My first Wiki page=

Hello, and welcome to my first wiki page!

==My semester==

This semester I am taking the following courses:

* CSC103
* REL220
* FRN220
* ECO153

==My favorite books==

# ''Anna Karenina'' by Leo Tolstoy
# ''Madame Bovary'' by Gustave Flaubert
# ''War and Peace'' by Leo Tolstoy
# ''Lolita'' by Vladimir Nabokov
# ''The Adventures of Huckleberry Finn'' by Mark Twain
# ''Hamlet'' by William Shakespeare
# ''The Great Gatsby'' F. Scott Fitzgerald
# ''In Search of Lost Time'' by Marcel Proust
# ''The Stories of Anton Chekhov'' by Anton Chekhov
# ''Middlemarch'' by George Eliot

Remarkably, I found out that this is the same list of books selected by the ''New York Times'' as the best 10 novels of all times!!!
- Save your page and observe how Mediawiki display what you have entered in the editor!
- Click edit and modify the page, adding more sections, changing the lists, to reflect your taste and your inspiration.
- In edit mode, locate a place in your text where you would like to include a picture, say of a computer, and add the statement below:
[[Image:103b-xx_computer.jpg]]
(You should replace xx by the two letters that represent your account!)
- Save your page.
- Your page will show Image:103b-xx_computer.jpg in red, indicating that Mediawiki does not have the picture and cannot display it.
- Pick a computer picture (or some picture of your choice) from Google Images, for example, and save it to your H: drive.
- Go back to your Wiki page and click on Image:103b-xx_computer.jpg
- In the Download window, click on Browse and locate the picture on your H: drive.
- Upload it!
- Go back to your Wiki page and reload it. See the picture?
- Practice, add other pictures, sections, subsections, and lists.
- If you have more time, you may want to check this more complicated | page with more features, and incorporate some of them in your own Wiki page.
That's it for today
The homework assignment will ask you to explore both the simulator and Wiki pages some more.
Hope you enjoyed the lab!
