Tutorial: Assembly Language with the Raspberry Pi
--D. Thiebaut (talk) 08:19, 3 July 2015 (EDT)
This is a very basic introduction to coding in assembly language on the ARM processor of the Raspberry Pi. It is intended to provide examples of code for typical operations one may want to do, not as an introduction to assembly language.
You can find more tutorials here.
Contents
- 1 References
- 2 Setup
- 3 Program that Returns an Exit Code
- 4 Hello World!
- 5 Arithmetic With Integer Variables
- 6 Arithmetic With Integer Variables (Version 2)
- 7 Passing Parameters by Value
- 8 Passing Parameters by Reference
- 9 Using the C-function scanf() for User Input
- 10 Pausing the Program using the sleep()/usleep() C Functions
- 11 Recursive Towers of Hanoi
- 12 Blinking LED
References
- ARM Assembly Manual at cwru.edu.
- InfoCenter.arm.com
- ThinkinGeek.com
Setup
- Please refer to this page for information on how to set your system up. I'm using a Mac connected to the RaspberryPi 2 via wifi, and ssh-ing to it in a Terminal window.
- The controller used in this tutorial is a Raspberry Pi 2, running 2015-05-05-raspbian-wheezy. No special customization was performed, except setting up USB-based Wifi communication.
Program that Returns an Exit Code
- This example is taken from thinkingeek.com's tutorial on assembly on the Pi. It is repeated here for completeness. Refer to thinkingeek.com's excellent tutorials for a deeper understanding of what is going on.
/* first.s
   from thinkingeek.com
   http://thinkingeek.com/2013/01/09/arm-assembler-raspberry-pi-chapter-1/
   Defines a main function that returns 2 as an exit code.

*/

.global main    /* 'main' must be visible by the C compiler. */

.func main      /* declare 'main' as a function              */
main:
    mov r0, #2       /* load immediate value 2 into Register r0 */
    bx lr            /* return 2 to Operating Sytem             */
Create the program
Note that all the commands below must be run on the Raspberry Pi, either directly, if you have connected a keyboard and video monitor to it, or remotely, via ssh and an ethernet cable or a Wifi link.
- ssh to the Pi using the Terminal Window. Refer to this page for how to do this.
- Use your favorite editor on the Pi (mine is emacs), create a file called first.s and enter this code. If you are interested in bypassing the editor, simply type this:
cat > first.s
- and paste the code above. Then press ENTER, Control-D, ENTER, and this should create the file for you.
- To verify that the file is created, type this:
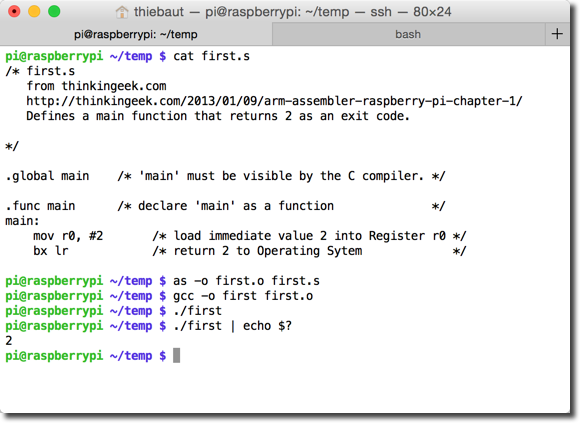
cat first.s
- and you should see the contents of the file.
Assemble, Compile, and Run!
- Assemble the code to create an object file:
as -o first.o first.s
- This will create the object file first.o
- Compile it. The object file is not executable. A C compiler can read it, though, and transform it into an executable.
gcc -o first first.o
- This takes the object file first.o and generates the executable file first.
- Run it!
./first
- The program should run and not display anything. As long as you don't get an error, your have been successful. The reason there is no output is that the program does not explicitly print anything, and simply returns a number that the operating system gets. Whenever you run a program on the command line, it returns a number at the end, revealing some status information about whether the program was successful in doing whatever we asked it to do. To reveal the number, we can use the shell command "echo $?" which displays the number returned by the last program that was run from the command line.
    ./first | echo $?
    2
- The number 2 should be printed.
Hello World!
- Here's the program:
@ hello.s
@   D. Thiebaut
@   Just your regular Hello World program!
@


@ ---------------------------------------
@	Data Section
@ ---------------------------------------

	.data
string: .asciz "\nHello World!\n"

@ ---------------------------------------
@	Code Section
@ ---------------------------------------

	.text
	.global main
	.extern printf

main:
        push {ip, lr}

        ldr r0, =string
        bl printf

        pop {ip, pc}
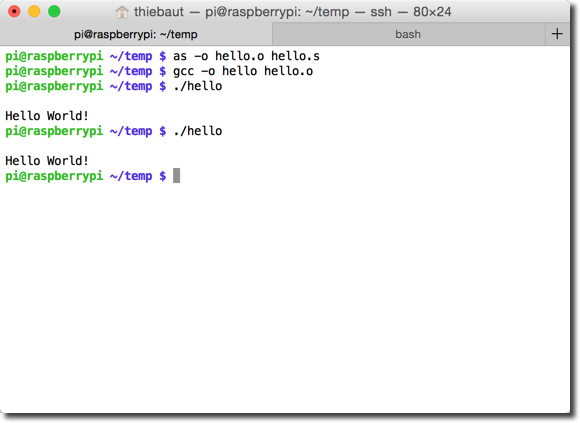
Assemble, Link/Compile, and Run
Arithmetic With Integer Variables
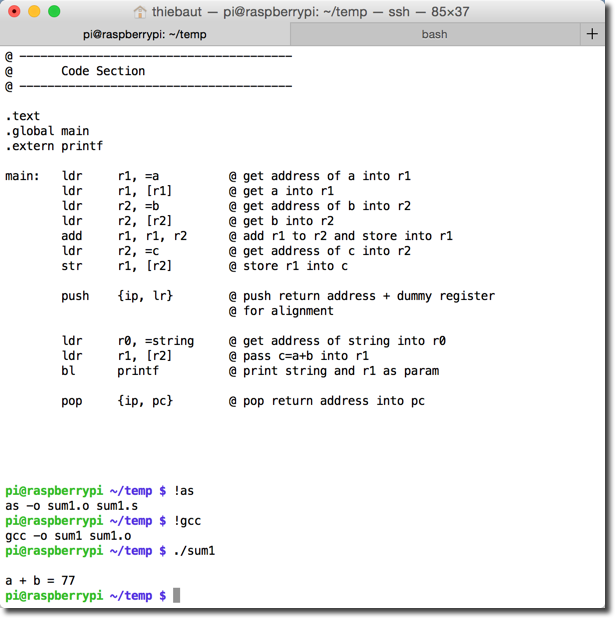
@ sum1.s
@   D. Thiebaut
@   add 2 variables together
@


@ ---------------------------------------
@	Data Section
@ ---------------------------------------

	.data
	.balign 4
string: .asciz "\na + b = %d\n"
a:	.word	33
b:	.word	44
c:	.word 	0		@ will contain a+b

@ ---------------------------------------
@	Code Section
@ ---------------------------------------

.text
.global main
.extern printf

main:
        push 	{ip, lr}	@ push return address + dummy register
				@ for alignment

        ldr	r1, =a		@ get address of a into r1
	ldr	r1, [r1]	@ get a into r1
	ldr	r2, =b		@ get address of b into r2
	ldr	r2, [r2]	@ get b into r2
	add	r1, r1, r2	@ add r1 to r2 and store into r1
	ldr	r2, =c		@ get address of c into r2
	str	r1, [r2]	@ store r1 into c


        ldr 	r0, =string 	@ get address of string into r0
	ldr	r1, [r2]	@ pass c=a+b into r1
        bl 	printf		@ print string and r1 as param

        pop 	{ip, pc}	@ pop return address into pc
Arithmetic With Integer Variables (Version 2)
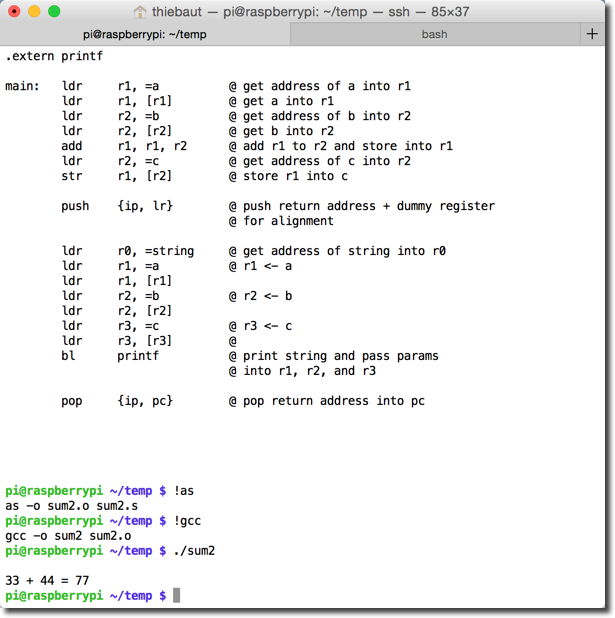
- This version performs the same arithmetic, but generates a more sophisticated output.
@   sum2.s
@   D. Thiebaut
@   add 2 variables together and print the result.
@


@ ---------------------------------------
@	Data Section
@ ---------------------------------------

	.data
	.balign 4
string: .asciz "\n%d + %d = %d\n"
a:	.word	33
b:	.word	44
c:	.word 	0		@ will contain a+b

@ ---------------------------------------
@	Code Section
@ ---------------------------------------

.text
.global main
.extern printf

main:
        push 	{ip, lr}	@ push return address + dummy register
				@ for alignment

	ldr	r1, =a		@ get address of a into r1
	ldr	r1, [r1]	@ get a into r1
	ldr	r2, =b		@ get address of b into r2
	ldr	r2, [r2]	@ get b into r2
	add	r1, r1, r2	@ add r1 to r2 and store into r1
	ldr	r2, =c		@ get address of c into r2
	str	r1, [r2]	@ store r1 into c


        ldr 	r0, =string 	@ get address of string into r0
	ldr	r1, =a		@ r1 <- a
	ldr	r1, [r1]
	ldr	r2, =b		@ r2 <- b
	ldr	r2, [r2]
	ldr	r3, =c		@ r3 <- c
	ldr	r3, [r3]	@
        bl 	printf		@ print string and pass params
				@ into r1, r2, and r3

        pop 	{ip, pc}	@ pop return address into pc
Passing Parameters by Value
- In this example, two ints are passed by value to the function sumFunc. The function adds them up, and returns the result in r0.
@  sum3.s
@  D. Thiebaut
@  Illustrates how to pass 2 ints by value
@  to a function that adds them up and returns
@  the sum in r0.

@ ---------------------------------------
@	Data Section
@ ---------------------------------------

	.data
	.balign 4
string: .asciz "\n%d + %d = %d\n"
a:	.word	33
b:	.word	44
c:	.word 	0		@ will contain a+b

@ ---------------------------------------
@	Code Section
@ ---------------------------------------

.text
.global main
.extern printf


@ ---------------------------------------
@ sumFunc: gets 2 ints in r1 and r2, adds
@ 	them up and saves the results in
@	r0.
sumFunc:
	push	{ip, lr}
	add	r0, r1, r2
	pop	{ip, pc}

@ ---------------------------------------
@ main: passes 2 ints to sumFunc and prints
@ the resulting value using printf
main:   push 	{ip, lr}	@ push return address + dummy register
				@ for alignment
	ldr	r1, =a		@ get address of a into r1
	ldr	r1, [r1]	@ get a into r1
	ldr	r2, =b		@ get address of b into r2
	ldr	r2, [r2]	@ get b into r2

	bl	sumFunc		@ pass (r1, r2) to sumFunc
				@ gets sum back in r0
	ldr	r2, =c		@ get address of c into r2
	str	r0, [r2]	@ store r0 into c


	@ printf( "%d + %d = %d\n", r1, r2, r3 )
	@ (format-string address passed in r0)
        ldr 	r0, =string 	@ get address of string into r0
	ldr	r1, =a		@ r1 <- a
	ldr	r1, [r1]
	ldr	r2, =b		@ r2 <- b
	ldr	r2, [r2]
	ldr	r3, =c		@ r3 <- c
	ldr	r3, [r3]	@
        bl 	printf		@ print string and pass params
				@ into r1, r2, and r3

@ return to OS
        pop 	{ip, pc}	@ pop return address into pc
pi@raspberrypi ~/temp $ as -o sum3.o sum3.s
pi@raspberrypi ~/temp $ gcc -o sum3 sum3.o
pi@raspberrypi ~/temp $ ./sum3

33 + 44 = 77
pi@raspberrypi ~/temp $
Passing Parameters by Reference
@ sum4.s
@   D. Thiebaut
@   Illustrates how to pass 2 ints by reference
@   to a function that adds them up and returns
@   the sum in r0.

@ ---------------------------------------
@	Data Section
@ ---------------------------------------

	.data
	.balign 4
string: .asciz "\n%d + %d = %d\n"
a:	.word	33
b:	.word	44
c:	.word 	0		@ will contain a+b
d:	.word	55
e:	.word	22

@ ---------------------------------------
@	Code Section
@ ---------------------------------------

.text
.global main
.extern printf


@ ---------------------------------------
@ sumFunc: gets 2 ints in r1 and r2, adds
@ 	them up and saves the results in
@	r0.
sumFunc:
	push	{ip, lr}
	ldr	r1, [r1]
	ldr	r2, [r2]
	add	r0, r1, r2
	pop	{ip, pc}

@ ---------------------------------------
@ printFunc: prints [r1], [r2], r3 in this way.
@ printf( "%d + %d = %d\n", r1, r2, r3 )
@ (format-string address passed in r0)
printFunc:
	push	{ip, lr}
        ldr 	r0, =string 	@ get address of string into r0
	ldr	r1, [r1]
	ldr	r2, [r2]
	mov	r3, r3		@ not necessary...
        bl 	printf		@ print string and pass params
				@ into r1, r2, and r3

	pop	{ip, pc}

@ ---------------------------------------
@ main: passes 2 ints to sumFunc and prints
@ the resulting value using printf
main:   push 	{ip, lr}	@ push return address + dummy register
				@ for alignment

@ c = a + b
	ldr	r1, =a		@ get address of a into r1
	ldr	r2, =b		@ get address of b into r2

	bl	sumFunc		@ pass (r1, r2) to sumFunc
				@ gets sum back in r0
	ldr	r3, =c		@ get address of c into r2
	str	r0, [r3]	@ store r0 into c

@ print a + b = c
	ldr	r1, =a
	ldr	r2, =b
	ldr	r3, =c
	ldr	r3, [r3]
	bl	printFunc


@ return to OS
        pop 	{ip, pc}	@ pop return address into pc
pi@raspberrypi ~/temp $ as -o sum4.o sum4.s
pi@raspberrypi ~/temp $ gcc -o sum4 sum4.o
pi@raspberrypi ~/temp $ ./sum4

33 + 44 = 77
pi@raspberrypi ~/temp $
Using the C-function scanf() for User Input
@ scanfExample1.s
@ D. Thiebaut
@ A simple example illustrating how one
@ can call the C function scanf() from
@ assembly.
@ The C example for this code would be:
@
@	int num = 0;
@	printf( "> " );
@	scanf( "%d", &num );
@	print( "your input: %d\n", num ) ;
@

@ ---------------------------------------
@	Data Section
@ ---------------------------------------

	.data
	.balign 4
prompt:	.asciz	"> "
format: .asciz 	"%d"
num:	.int	0
output: .asciz 	"your input: %d\n"

@ ---------------------------------------
@	Code Section
@ ---------------------------------------

	.text
	.global main
	.extern printf
	.extern scanf

main:   push 	{ip, lr}	@ push return address + dummy register
				@ for alignment

	ldr	r0, =prompt	@ print the prompt
	bl	printf

	ldr     r0, =format	@ call scanf, and pass address of format
	ldr	r1, =num	@ string and address of num in r0, and r1,
	bl	scanf		@ respectively.

	ldr	r1, =num	@ print num formatted by output string.
	ldr	r1, [r1]
	ldr	r0, =output
	bl	printf


        pop 	{ip, pc}	@ pop return address into pc
pi@raspberrypi ~/temp $ make
as   -o scanfExample1.o scanfExample1.s
gcc -o scanfExample1 scanfExample1.o
pi@raspberrypi ~/temp $ ./scanfExample1
> 123456789
your input: 123456789
pi@raspberrypi ~/temp $
Pausing the Program using the sleep()/usleep() C Functions
@ delayExample.s
@ D. Thiebaut
@ outputs "Hello World!" 10 times with 1 sec
@ or 0.5 sec delay between each output.
@ Use the function sleep() for second delays,
@ and the function usleep() for finer delays.


@ ---------------------------------------
@	Data Section
@ ---------------------------------------

	.data
	.balign 4
hello:  .asciz "Hello World!\n\n"
seconds:
	.int	1		@ 1 sec
microsec:
	.int	500000		@ 0.5 sec

n	.req    r6              @ counter
max	.req	r5		@ max # iterations

@ ---------------------------------------
@	Code Section
@ ---------------------------------------

	.text
	.global main
	.extern printf
	.extern sleep
	.extern usleep

main:   push 	{ip, lr}	@ push return address + dummy register
				@ for alignment

	mov	n, #0
	mov	max, #10

loop:	cmp	n, max		@ n>max?
	bgt	done		@ yes, done
				@ no, output string

        ldr 	r0, =hello
        bl 	printf		@ print string and r1 as param

@	ldr	r0, =seconds	@ use sleep for integer # of
@	ldr	r0, [r0]	@ seconds
@	bl	sleep

	ldr	r0, =microsec	@ use usleep for microsecond
	ldr	r0, [r0]	@ delays.
	bl	usleep

	add	n, #1		@ n++
	b	loop

done:
        pop 	{ip, pc}	@ pop return address into pc
Recursive Towers of Hanoi
- This is the typical recursive Towers of Hanoi program. You can read more about this typical computer science problem in Wikipedia.
- The Python version of this program is given below:
# towers of Hanoi
# D. Thiebaut

def moveDisks(n, Source, Dest, Extra ):
    if n==1:
        print( "Move disk from", Source, "to", Dest )
    else:
        moveDisks( n-1, Source, Extra, Dest )
        moveDisks( 1, Source, Dest, Extra )
        moveDisks( n-1, Extra, Dest, Source )

def main():
    n = int( input( "How many disks? " ) )
    moveDisks( n, 'A', 'B', 'C' )

main()
Version 1: Fixed Number of Disks
- We are passing the pegs through r5, r6, and r7, and n through r4. We need swap the pegs when calling recursively, so r5, r6 and r7 get modified inside a call, and we cannot let the recursion modify them. Similarly, we decrement n (r4) by 1 inside the call, and we don't want the recursion to alter n. Because of this, we save r4, r5, r6 and r7 in the stack when calling moveDisks(). We add r8 because we are also saving pc, and we need an even number of registers for good alignment in the stack.
@   hanoi.s
@   D. Thiebaut
@   Recursive towers of Hanoi
@   See https://en.wikipedia.org/wiki/Tower_of_Hanoi Wikipedia for details.

@ ---------------------------------------
@	Data Section
@ ---------------------------------------

	.data
	.balign 4
string: .asciz  "move disk from %c to %c\n\0"
peg1:	.int	'A'		@ name of Peg 1, must be a char
peg2:	.int	'B'
peg3:	.int	'C'
n:	.int	4		@ number of disks to move


@ ---------------------------------------
@	Code Section
@ ---------------------------------------

	.text
	.global main
	.extern printf


@ ---------------------------------------
@ moveDisks( n, Source, Dest, Extra )
@	    r4   r5     r6    r7
@    if n==1:
@	printf( "move disk from %c to %c\n", Source, Dest )
@    else:
@	moveDisks( n-1, Source, Extra, Desk )
@	printf( "move disk from %c to %c\n", Source, Dest )
@	moveDisks( n-1, Extra, Dest, Source )
@
moveDisks:
	push	{r4-r8, lr}

	@ if n==1:
	cmp	r4, #1
	bgt	moveN_1Disks

move1Disk:
	@ print( "move disk from %c to %c\n", Source, Dest )
	ldr	r0, =string
	mov	r1, r5
	mov	r2, r6
	bl	printf
	b	endMoveDisk

moveN_1Disks:
	@ moveDisks( n-1, Source, Extra, Dest )
	mov	r8, r7		@ swap Dest & Extra
	mov	r7, r6
	mov	r6, r8
	sub	r4, #1
	bl	moveDisks
	mov	r8, r7		@ unswap Dest & Extra
	mov	r7, r6
	mov	r6, r8

	@ print( "move disk from %c to %c\n", Source, Dest )
	ldr	r0, =string
	mov	r1, r5
	mov	r2, r6
	bl	printf

	@ moveDisks( n-1, Extra, Dest, Source )
	mov	r8, r5		@ swap Source and Extra, i.e. r5 and r7.
	mov	r5, r7
	mov	r7, r8
	bl	moveDisks

endMoveDisk:
	pop	{r4-r8, pc}


@ ---------------------------------------
@ main: call moveDisks( n, peg1, peg2, peg3 )

main:   push 	{ip, lr}	@ push return address + dummy register
				@ for alignment

	ldr	r4, =n		@ pass n
	ldr	r4, [r4]
	ldr	r5, =peg1	@ pass peg1
	ldr	r5, [r5]
	ldr	r6, =peg2	@ pass peg2
	ldr	r6, [r6]
	ldr	r7, =peg3	@ pass peg3
	ldr	r7, [r7]
	bl	moveDisks	@ call moveDisks( n, peg1, peg2, peg3 )


@ return to OS
        pop 	{ip, pc}	@ pop return address into pc
pi@raspberrypi ~/temp $ make
as -o hanoi.o hanoi.s
gcc -o hanoi hanoi.o
pi@raspberrypi ~/temp $ ./hanoi
move disk from A to C
move disk from A to B
move disk from C to B
move disk from A to C
move disk from B to A
move disk from B to C
move disk from A to C
move disk from A to B
move disk from C to B
move disk from C to A
move disk from B to A
move disk from C to B
move disk from A to C
move disk from A to B
move disk from C to B
pi@raspberrypi ~/temp $
Version 2: Prompt User for Number of Disks
@   hanoi2.s
@   D. Thiebaut
@   Recursive towers of Hanoi
@   Prompts the user for the number of disks to
@   move.

@ ---------------------------------------
@	Data Section
@ ---------------------------------------

	.data
	.balign 4
prompt:	.asciz	"How many disk do you want to move? "
format:	.asciz	"%d"
string: .asciz  "move disk from %c to %c\n\0"
peg1:	.int	'A'		@ name of Peg 1, must be a char
peg2:	.int	'B'
peg3:	.int	'C'
n:	.int	4		@ number of disks to move


@ ---------------------------------------
@	Code Section
@ ---------------------------------------

	.text
	.global main
	.extern printf
	.extern	scanf

@ ---------------------------------------
@ getNumberOfDisks():
@ prompts the user and puts the number
@ in n.
getNumberOfDisks:
	push 	{ip, lr}	@ push return address + dummy register
				@ for alignment

	ldr	r0, =prompt	@ print the prompt
	bl	printf

	ldr     r0, =format	@ call scanf, and pass address of format
	ldr	r1, =n		@ string and address of n in r0, and r1,
	bl	scanf		@ respectively.

        pop 	{ip, pc}

@ ---------------------------------------
@ moveDisks( n, Source, Dest, Extra )
@	    r4   r5     r6    r7
@    if n==1:
@	printf( "move disk from %c to %c\n", Source, Dest )
@    else:
@	moveDisks( n-1, Source, Extra, Desk )
@	printf( "move disk from %c to %c\n", Source, Dest )
@	moveDisks( n-1, Extra, Dest, Source )
@
moveDisks:
	push	{r4-r8, lr}

	@ if n==1:
	cmp	r4, #1
	bgt	moveN_1Disks

move1Disk:
	@ print( "move disk from %c to %c\n", Source, Dest )
	ldr	r0, =string
	mov	r1, r5
	mov	r2, r6
	bl	printf
	b	endMoveDisk

moveN_1Disks:
	@ moveDisks( n-1, Source, Extra, Dest )
	mov	r8, r7		@ swap Dest & Extra
	mov	r7, r6
	mov	r6, r8
	sub	r4, #1
	bl	moveDisks
	mov	r8, r7		@ unswap Dest & Extra
	mov	r7, r6
	mov	r6, r8

	@ print( "move disk from %c to %c\n", Source, Dest )
	ldr	r0, =string
	mov	r1, r5
	mov	r2, r6
	bl	printf

	@ moveDisks( n-1, Extra, Dest, Source )
	mov	r8, r5		@ swap Source and Extra, i.e. r5 and r7.
	mov	r5, r7
	mov	r7, r8
	bl	moveDisks

endMoveDisk:
	pop	{r4-r8, pc}


@ ---------------------------------------
@ main: call moveDisks( n, peg1, peg2, peg3 )

main:   push 	{ip, lr}	@ push return address + dummy register
				@ for alignment

	bl	getNumberOfDisks
				@ get n

	ldr	r4, =n		@ pass n
	ldr	r4, [r4]
	ldr	r5, =peg1	@ pass peg1
	ldr	r5, [r5]
	ldr	r6, =peg2	@ pass peg2
	ldr	r6, [r6]
	ldr	r7, =peg3	@ pass peg3
	ldr	r7, [r7]
	bl	moveDisks	@ call moveDisks( n, peg1, peg2, peg3 )


@ return to OS
        pop 	{ip, pc}	@ pop return address into pc
pi@raspberrypi ~/temp $ ./hanoi2
How many disk do you want to move? 1
move disk from A to B
pi@raspberrypi ~/temp $ ./hanoi2
How many disk do you want to move? 2
move disk from A to C
move disk from A to B
move disk from C to B
pi@raspberrypi ~/temp $ ./hanoi2
How many disk do you want to move? 3
move disk from A to B
move disk from A to C
move disk from B to C
move disk from A to B
move disk from C to A
move disk from C to B
move disk from A to B
pi@raspberrypi ~/temp $
Blinking LED
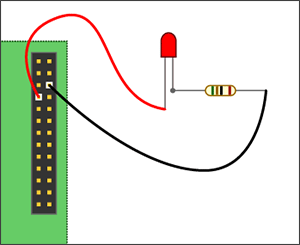
This example is inspired from this page: http://www.thirdeyevis.com/pi-page-2.php, from which the image on the right is taken.
This example requires some simple wiring of an LED and a resistor to 2 GPIO pins of the RaspPi 2 header. The black wire is connected to Pin 6 of the header (GND), and the red wire to Pin 7 (BCM 4). Running the code also requires downloading first the wiringPi library which can be found on this page: http://wiringpi.com/examples/blink/.
C program
The C program that tests the setup is given below:
/* blink.c
   D. Thiebaut
   taken from https://www.raspberrypi.org/forums/viewtopic.php?f=33&t=23090
   blinks Physical Pin 7 On and Off, 10 times.

   to compile and run:
   gcc -o blink blink.c -lwiringPi
   sudo ./blink
*/

#include <wiringPi.h>
#include <stdio.h>
#include <stdlib.h>

int main ( void ) {
  int pin = 7;
  printf("Raspberry Pi wiringPi blink test\n");

  if (wiringPiSetup() == -1) {
    printf( "Setup didn't work... Aborting." );
    exit (1);
  }

  pinMode(pin, OUTPUT);

  int i;
  for ( i=0; i<10; i++ ) {
    printf("LED On\n");
    delay(250);

    printf("LED Off\n");
    delay(250);
  }

  return 0;
}
- Compile and run as follows:
  gcc -o blink blink.c -lwiringPi
  sudo ./blink
- Verify that the C code above works before trying out the assembly version.
Assembly Version
@ blink.s
@ D. Thiebaut
@ based on the following C program:
@
@ #include <wiringPi.h>
@ #include <stdio.h>
@ #include <stdlib.h>
@
@ int main (void) {
@   int pin = 7;
@   printf("Raspberry Pi wiringPi blink test\n");
@
@   if (wiringPiSetup() == -1) {
@     printf( "Setup didn't work... Aborting." );
@     exit (1);
@   }
@
@   pinMode(pin, OUTPUT);
@   int i;
@   for ( i=0; i<10; i++ ) {
@     printf("LED On\n");
@     digitalWrite(pin, 1);
@     delay(250);
@
@     printf("LED Off\n");
@     digitalWrite(pin, 0);
@     delay(250);
@   }
@
@   return 0;
@ }
@
@ To assemble, link, and run:
@
@  as -o blink.o blink.s
@  gcc -o blink2 blink.o -lwiringPi
@  sudo ./blink2

@ ---------------------------------------
@	Data Section
@ ---------------------------------------

	 .data
	 .balign 4
Intro: 	 .asciz  "Raspberry Pi wiringPi blink test\n"
ErrMsg:	 .asciz	"Setup didn't work... Aborting...\n"
pin:	 .int	7
i:	 .int	0
delayMs: .int	250
OUTPUT	 =	1

@ ---------------------------------------
@	Code Section
@ ---------------------------------------

	.text
	.global main
	.extern printf
	.extern wiringPiSetup
	.extern delay
	.extern digitalWrite
	.extern pinMode

main:   push 	{ip, lr}	@ push return address + dummy register
				@ for alignment

@  printf( "blink..." )	;
	ldr	r0, =Intro
        bl 	printf

@  if (wiringPiSetup() == -1) {
@     printf( "Setup didn't work... Aborting." ) ;
@     exit (1)					 ;
@  }
	bl	wiringPiSetup
	mov	r1,#-1
	cmp	r0, r1
	bne	init
	ldr	r0, =ErrMsg
	bl	printf
	b	done

@  pinMode(pin, OUTPUT)		;
init:
	ldr	r0, =pin
	ldr	r0, [r0]
	mov	r1, #OUTPUT
	bl	pinMode

@   for ( i=0; i<10; i++ ) {
	ldr	r4, =i
	ldr	r4, [r4]
	mov	r5, #10
forLoop:
	cmp	r4, r5
	bgt	done

@	digitalWrite(pin, 1) ;
	ldr	r0, =pin
	ldr	r0, [r0]
	mov	r1, #1
	bl 	digitalWrite

@       delay(250)		 ;
	ldr	r0, =delayMs
	ldr	r0, [r0]
	bl	delay

@       digitalWrite(pin, 0) 	;
	ldr	r0, =pin
	ldr	r0, [r0]
	mov	r1, #0
	bl 	digitalWrite

@       delay(250)		 ;
	ldr	r0, =delayMs
	ldr	r0, [r0]
	bl	delay

	add	r4, #1
	b	forLoop

done:
        pop 	{ip, pc}	@ pop return address into pc
- Assemble, link, and run as follows:
as -o blink.o blink.s
gcc -o blink2 blink.o -lwiringPi
sudo ./blink2
- You should observe the LED blinking 10 times at a rate of 2 Hz (ON OFF ON OFF lasts 1 second).

