IBookAuthor: Converting a GWT project to a Dashboard Widget
--D. Thiebaut 19:50, 11 February 2013 (EST)
This is just a quick tutorial, or rather a series of simple steps one must take to convert a GWT project created using Eclipse and the GWT Software Development Kit, and transform it into a Dashboard widget that can be included into an iBook.
Contents
Before You Start
You will need Eclipse and the complete GWT package installed on your machine first. The steps illustrated in this tutorial were performed on Mac OSX.
Everything needed to get GWT installed and running is fully explained in this page.
We will take the Stock Watcher project fully presented here as our example. Note that there is a shorter version of this example that relies on the GWT Designer that is easier, and that we have used here to develop the basic widget.
The Stock-Watcher GWT Application
Once you have created a GWT project that opens and works well in the default browser, you are ready to compile the project in javascript.
Creating a Javascript Version of the Project
- In Eclipse, right click on the project (in this case StockWatcher2), select Google, then GWT Compile
- Keep the project name (StockWatcher2), log level as info and Output Style as pretty.
- Keep the rest of the information as suggested.
- Click on Apply and then Compile.
- A new directory called war is created in the main folder of the project; its contents is shown below:
StockWatcher.css
StockWatcher.html
WEB-INF/
blue_gradient.gif
com.dft.stockwatcher.StockWatcher/
drafts.gif
gray_gradient.gif
home.gif
Creating the required Dashboard Widget files
First you should create a copy of the war directory as the new widget directory. In the terminal, once in the main project directory these commands will accomplish just that:
mkdir StockWatcher.wdgt
rsync -av war/* StockWatcher.wdgt/
Default.png
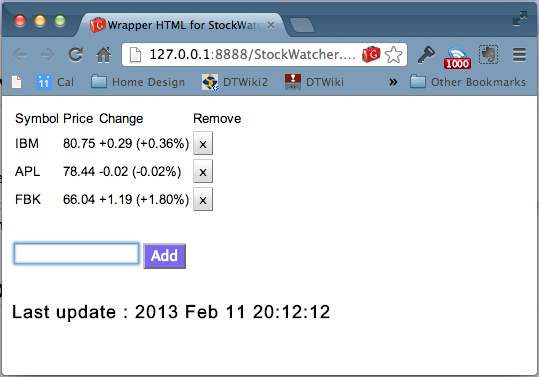
To create a static image of the Stock Watcher simply take a screen snapshot of the GWT project when it appears in the browser, and call it Default.png. To create the Default@2x.png file, simply use an application such as ImageMagick to create png 4 times larger:
convert Default.png -resize 200% Default\@2x.png
The two pictures are thumbnailed below:
|
|
|
Info.plist
To create the Info.plist file, simply copy the Info.plist from the skeleton tutorial into the StockWatcher.wdgt directory.
<?xml version="1.0" encoding="UTF-8"?>
<!DOCTYPE plist PUBLIC "-//Apple//DTD PLIST 1.0//EN" "http://www.apple.com/DTDs/PropertyList-1.0.dtd">
<plist version="1.0">
<dict>
        <key>CFBundleDevelopmentRegion</key>
        <string>English</string>
        <key>CFBundleDisplayName</key>
        <string>Simulator</string>
        <key>CFBundleIdentifier</key>
        <string>com.dft.stockwatcher</string>
        <key>CFBundleName</key>
        <string>StockWatcher</string>
        <key>CFBundleShortVersionString</key>
        <string>1.0</string>
        <key>CFBundleVersion</key>
        <string>1.0</string>
        <key>CloseBoxInsetX</key>
        <integer>15</integer>
        <key>CloseBoxInsetY</key>
        <integer>15</integer>
        <key>Height</key>
        <integer>433</integer>
        <key>MainHTML</key>
        <string>StockWatcher.html</string>
        <key>Width</key>
        <integer>464</integer>
</dict>
</plist>
Testing the Widget (optional)
An easy way to check whether the setup with the new files is correctly organized is to open the widget from a Finder window, and right click on the widget and open it with Doc.app (default). If the widget is correctly setup it will be added to the dashboard dictionary and can be easily added to the dashboard.
Adding the Widget to the iBook
Open iBook Author and import the newly created Widget as HTML. Preview on an iPad and verify that stocks can be added, get updated, and be deleted.
If it all works, then... Congratulations!
- Warning!
- It has been reported by various authors who have attempted to import widgets generated using the GWT toolkit that sometimes the widget is not accepted by iBook Author, and that in some cases the presence of animated gif files in the project is the cause of the failure. In this case the animated gif should be converted to a static gif image.
- Archive file
- Available here


