Tutorial: Writing a Latex paper with ShareLatex.com for the ACM
--D. Thiebaut (talk) 18:47, 25 June 2013 (EDT)
|
This tutorial is a short series of steps required to write a paper formatted for publication by the Association for Computing Machinery (ACM) with latex using sharelatex.com. Sharelatex is a free (so far) Web-based tool for creating and formatting Latex papers.
Latex is a scientific document formatter that will allow you to generate professional quality documents ready for publication in conference proceedings or journals. It is not a WYSIWYG formatter. You write text and include special commands that are interpreted by the Latex compiler. Latex is a language. Not a programming language, but a typesetting language. You need to learn Latex commands to format documents in Latex. This tutorial assumes you are comfortable enough with Latex to use it to fit your needs. Its purpose is to show you how to use a fairly new browser-based tool to generate Latex documents.
|
Contents
Open a New Account and Create a Project
- Connect to sharelatex.com and create a new personal account (which is free). Group accounts require a paying membership.
- In the Project window, select New Project
- Blank Project
- Give it a name
- You are now placed in edit mode of a new file called main.tex. Erase its contents and replace it with this one:
% THIS IS SIGPROC-SP.TEX - VERSION 3.1
% WORKS WITH V3.2SP OF ACM_PROC_ARTICLE-SP.CLS
% APRIL 2009

\documentclass{acm_proc_article-sp}

\begin{document}

\title{Enter the Title Here}

\numberofauthors{1}
\author{
\alignauthor
Minnie Mouse\titlenote{This is Dr.~Mouse's first paper ever.}\\
       \affaddr{Disney Land}\\
       \affaddr{1 Orlando Lane}\\
       \affaddr{Orlando, Florida, USA}\\
       \email{aandra@someaddress.com}
}
\date{30 July 2013}

\maketitle
\begin{abstract}
This paper presents a new algorithm for sorting apples and oranges.
\end{abstract}

\keywords{ACM proceedings, \LaTeX, text tagging} % NOT required for Proceedings

\section{Introduction}

\section{The Body of The Paper}

\subsection{Subsections are cool}

\section{Conclusions}

\section{Acknowledgments}

%
% BIBLIOGRAPHY.
\bibliographystyle{abbrv}
\bibliography{myBiblio}

\balancecolumns
% That's all folks!
\end{document}
- For reference, the skeleton above is a reduced version of a fairly long article explaining how to create figures, tables, and other elements of a typical research article, and can be found in its entirety here. It is a good reference for many Latex commands.
- You still need another file containing formatting information before you can process this simple skeleton.
- In the left column, click on New and select New File. Call the file acm_proc_article-sp.cls, and copy/paste the (long) code found in this page.
Organization of your Browser Window
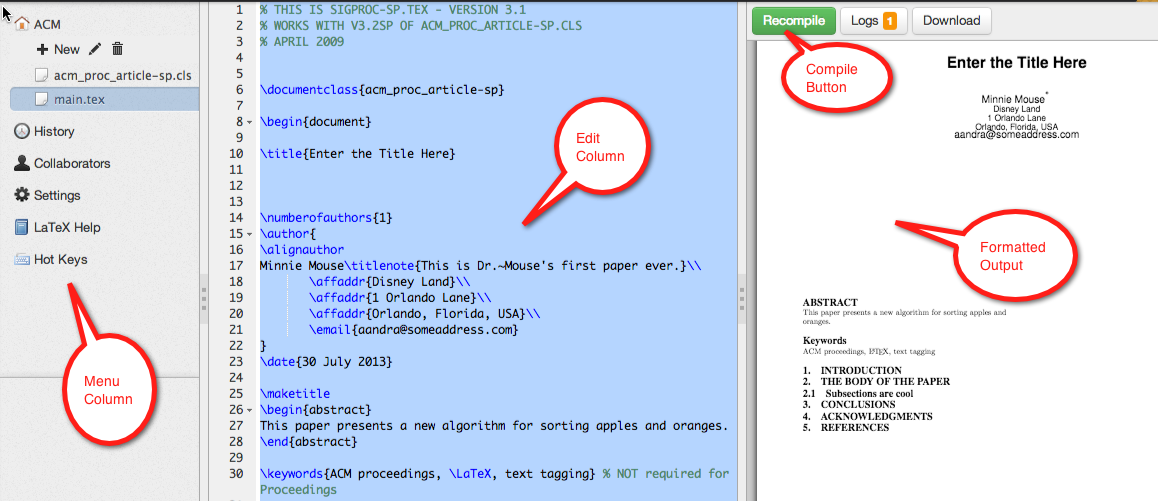
- First, recognize the different parts of the browser window.
- The middle column is the Edit column and where you enter the text of your article, along with Latex commands.
- When you click on the Recompile button, your raw Latex text is processed remotely, on ShareLatex's servers, and the resulting pdf is sent to the column on the right-hand side of the browser window.
- Go ahead, and click on Recompile. You should see a very simple and very empty one-page document on the right hand-side.
- You may want to edit the title and author(s) information of reflect your name and your research.
Renaming your files
By default, ShareLatex will label your Latex file with a predefined names, such as main.tex, for example. You can easily rename the file by clicking on it in the left-most column and entering the name you want:
Creating a new bibliographic entry
- Create a new file in your project and call it main.bib.
- Copy paste the information below in it:
@Article{Einstein05,
 author =       "Albert Einstein",
 title =        "{Zur Elektrodynamik bewegter K{\"o}rper}. ({German})
                [{On} the electrodynamics of moving bodies]",
 journal =      "Annalen der Physik",
 volume =       "322",
 number =       "10",
 pages =        "891--921",
 year =         "1905",
 DOI =          "http://dx.doi.org/10.1002/andp.19053221004"
}
- This is our first reference for our paper. It states the name of the author (only one in this case), the title of the paper, and where the paper was published, and when. To make a reference to this paper in our skeleton, we need to add a bit of text that will cite this paper, and also indicate that our bibliography is stored in the file main.bib
- First the citation. Add this new section and paragraph in your skeleton.
\section{Introduction}
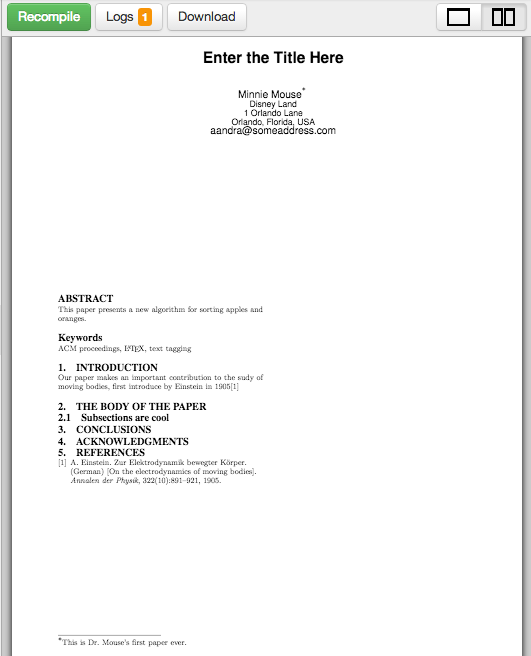
Our paper makes an important contribution to the sudy of moving bodies, first introduced by Einstein in 1905\cite{Einstein05}
- Then link the bibliography file to the paper. Go back to the main.tex paper and modify the bibliography command as follow:
\bibliography{main }
- Note: the main in the \bibliography command refers to the main.bib file. This way when Latex processes your document, it knows which file to read (main.bib) to find the citations that it found in your document (Einstein05).
Downloading the camera-ready PDF
- Once you have your skeleton ready, Recompile your document and observe the neatly empty 1-page document that appears in the right-hand side of the browser. For practice, download the PDF version by clicking on the Download button on the right side of the Recompile button.
- That's it! You should have a version of your PDF on your local machine.

Help with Latex and Good Latex References
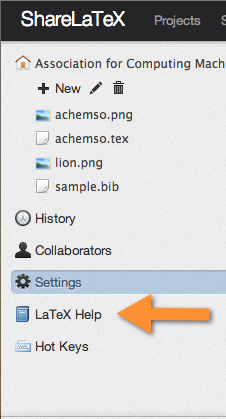
- ShareLatex has a pretty good set of Latex-related tips on various formatting commands:

- If you need additional information, there's plenty of good sites on the Web that will let you find anything you ever wanted to know about Latex. Below are just a few of them, stolen from the Latex/Ubuntu site.

