Difference between revisions of "Tutorial: Printed-Circuit Boards"
(→An Example) |
(→An Example) |
||
| Line 33: | Line 33: | ||
</center> | </center> | ||
| + | ==TinyCAD== | ||
| + | * Open TinyCAD | ||
| + | * Open the 74TTL library in the left pane | ||
| + | * Pick the Hex Inverters | ||
| + | * Drop two inverters on the blank schematics pane | ||
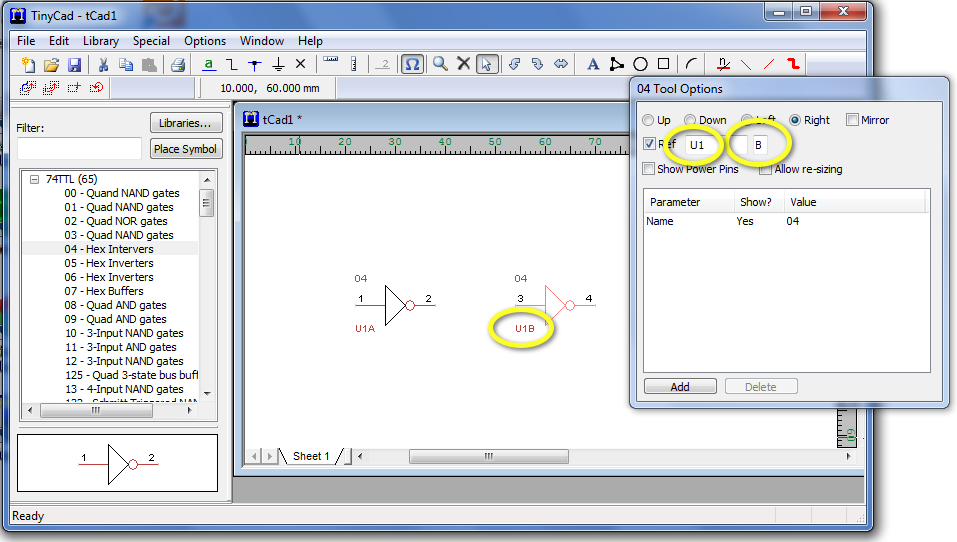
| + | * Update the reference for each gate (U1A and U1B) in the '''Tool Options''' window. | ||
| + | <center> | ||
| + | [[Image:TinyCAD1.png|500px]] | ||
| + | </center> | ||
<br /> | <br /> | ||
Revision as of 07:56, 23 June 2011
--D. Thiebaut 12:37, 20 June 2011 (EDT)
Contents
Software
All are open-source.
- TinyCAD
- FreePCB
- ViewMate (get the free registration code via email to install)
- PCBExpress/Sunstone: Web site where to order PCB from.
Process
- First create schematics with TinyCAD
- Then route the lines on a 4-layer board with FreePCB
- Check the CAM files generated by FreePCB with ViewMate
- Once the output files are ready, upload them to PCBExpress (accept 4-layers+mask option).
An Example
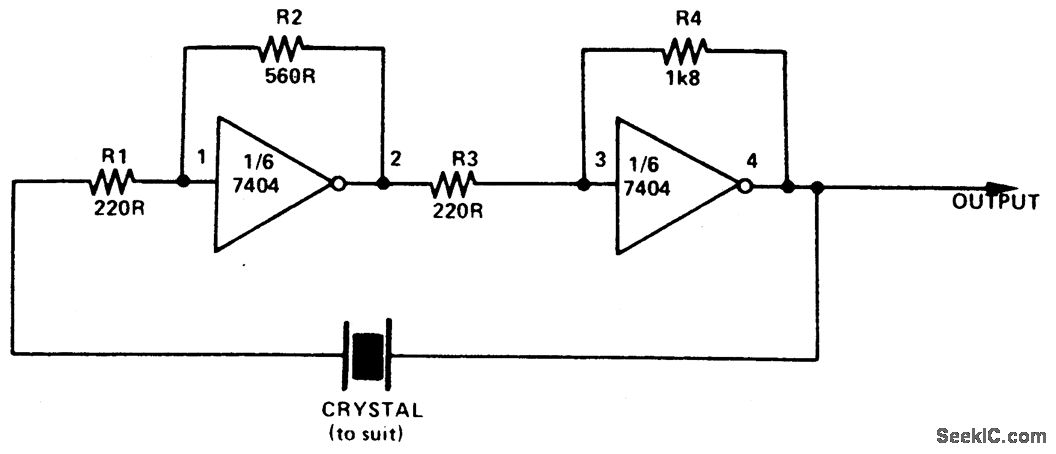
- We'll create a PCB for the following simple circuit taken from seekic.com:
TinyCAD
- Open TinyCAD
- Open the 74TTL library in the left pane
- Pick the Hex Inverters
- Drop two inverters on the blank schematics pane
- Update the reference for each gate (U1A and U1B) in the Tool Options window.


