Difference between revisions of "Tutorial: Using Tensorflow with Docker"
(Created page with "--~~~~ ---- <br /> __TOC__ <br /> <bluebox> These are very quick instructions for installing Docker under Mac OSX and for running Tensorflow on it. </bluebox> <br /> =Install ...") |
(→Run Docker) |
||
| Line 19: | Line 19: | ||
* It will open a Terminal window | * It will open a Terminal window | ||
* Note the IP that is specified at the end (should be http://192.168.99.100/) | * Note the IP that is specified at the end (should be http://192.168.99.100/) | ||
| − | + | ::<source lang="text"> | |
| + | |||
| + | |||
## . | ## . | ||
## ## ## == | ## ## ## == | ||
## ## ## ## ## === | ## ## ## ## ## === | ||
/"""""""""""""""""\___/ === | /"""""""""""""""""\___/ === | ||
| − | + | ~~~ {~~ ~~~~ ~~~ ~~~~ ~~~ ~ / ===- ~~~ | |
\______ o __/ | \______ o __/ | ||
\ \ __/ | \ \ __/ | ||
\____\_______/ | \____\_______/ | ||
| − | + | ||
| + | |||
| + | docker is configured to use the default machine with IP 192.168.99.100 | ||
| + | For help getting started, check out the docs at https://docs.docker.com | ||
| + | |||
| + | |||
| + | |||
| + | </source> | ||
docker is configured to use the default machine with IP 192.168.99.100 | docker is configured to use the default machine with IP 192.168.99.100 | ||
| Line 35: | Line 44: | ||
* Quick Docker by pressing Ctrl-C twice and return to the command line | * Quick Docker by pressing Ctrl-C twice and return to the command line | ||
<br /> | <br /> | ||
| + | |||
=Install TensorFlow "in" Docker= | =Install TensorFlow "in" Docker= | ||
<br /> | <br /> | ||
Revision as of 22:43, 12 February 2017
--D. Thiebaut (talk) 22:42, 12 February 2017 (EST)
These are very quick instructions for installing Docker under Mac OSX and for running Tensorflow on it.
Install Docker
- Go there: https://docs.docker.com/docker-for-mac/
- Download
- Click on the package (do not worry about the warning)
Run Docker
- Find Docker in the Applications and run it
- It will open a Terminal window
- Note the IP that is specified at the end (should be http://192.168.99.100/)
                        ##         .
                  ## ## ##        ==
               ## ## ## ## ##    ===
           /"""""""""""""""""\___/ ===
      ~~~ {~~ ~~~~ ~~~ ~~~~ ~~~ ~ /  ===- ~~~
           \______ o           __/
             \    \         __/
              \____\_______/


docker is configured to use the default machine with IP 192.168.99.100
For help getting started, check out the docs at https://docs.docker.com
docker is configured to use the default machine with IP 192.168.99.100
For help getting started, check out the docs at https://docs.docker.com
- Quick Docker by pressing Ctrl-C twice and return to the command line
Install TensorFlow "in" Docker
- Run the following command at the prompt, in the same Terminal session:
docker run -it -p 8888:8888 gcr.io/tensorflow/tensorflow
- This will download tensorflow and will take a few minutes (~ 8 minutes)
- Make a note of the URL that is given. It will be of the form:
http://localhost:8888/tree?token=someLongSeriesOfHexadecimalDigits
Start Jupiter
Jupiter is an application that runs in a browser and presents the user a virtual disk where the user can create folders and write programs.
- To start the Jupiter connected to Docker, open your browser and enter the URL that was given to you in the previous step, and replace localhost by the IP given next to the boat logo, above:
http://192.168.99.100:8888/tree?token=someLongSeriesOfHexadecimalDigits
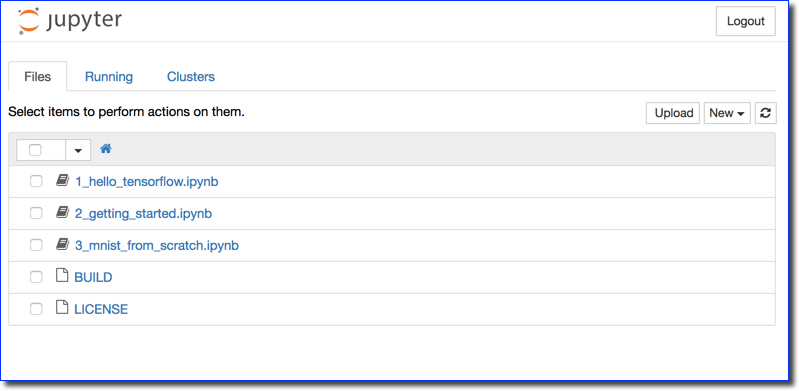
- You should end up with a window similar to this one:
